19 Quick Full Body Mobility Exercises to Help You Move and Feel Better
.webp)
Think about the last time you bent down to tie your shoes or get something off the floor. Did it feel easy, or was it a chore? If you're like most people, you probably experienced discomfort or stiffness. These feelings often stem from a lack of mobility. Full body mobility exercises can help target these issues so that you can move more freely and feel comfortable in your daily activities. In this article, we'll discuss the value of full body mobility exercises, especially as they relate to easing stiffness and improving your range of motion. You'll learn how to quickly regain lost mobility and feel more comfortable moving through life.
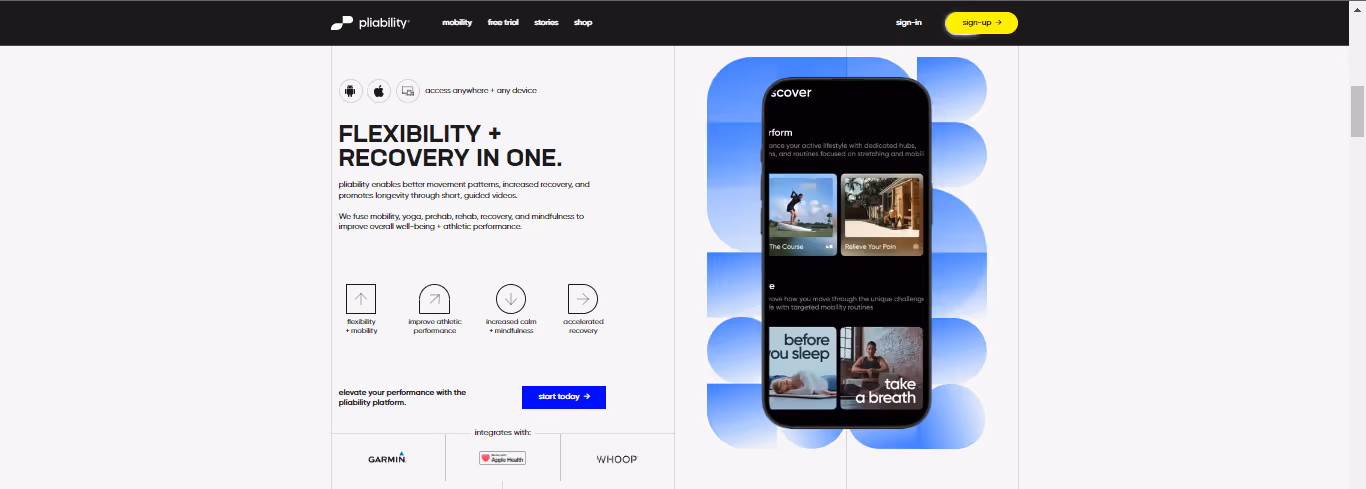
One way to boost your efforts is with Pliability's mobility app. This tool offers personalized routines that target your specific goals and help you recover lost range of motion to feel more comfortable in your everyday activities again.
What Is Mobility & Why It Matters

Mobility is the ability to move your body freely and easily, says physical therapist Amy Hutson, DPT, of SSM Health Physical Therapy. With mobility, we can be unlimited with our performance in day-to-day activities, says Hutson. So, not only does it affect the ability to engage in essential things like getting dressed and taking a shower, but how much range your joints have also impacted recreational activities like hiking, swimming, or dancing.
Flexibility Versus Mobility: What’s the Difference?
Mobility is different from flexibility or stability. The three are related, and you can only excel at one by neglecting the others. But it's essential to understand the differences. Flexibility means the body can achieve a particular position, says certified strength and conditioning specialist India McPeak.
Think of flexibility as a passive range of motion, like lengthening your muscles in a static stretch. On the other hand, stability is the ability to maintain a desired position or movement, explains McPeak. Think of stability like holding a plank steady, keeping a hip bridge, or balancing on one foot.
Why Mobility Matters
Oh, and BTW: Anyone and everyone can benefit from mobility training, says Winnie Yu, DPT, CSCS, a physical therapist at Bespoke Treatments in New York City. She explains that you don’t have to be experiencing pain or stiffness to start working on your mobility.
Mobility training is a great way to improve your overall joint and muscular health and can help keep you:
- Feeling better
- More fluid
- Less prone to injuries down the road
The Importance of Mobility for Overall Well-being
Most people need more mobility in key areas due to a lack of movement. And this is made worse by the funky positions we put our bodies in throughout the day. A lack of mobility (and full range of motion) can lead to the following issues: your posture risk of injury ability to perform certain exercises and quality of life are affected. This is why dedicating more time to improving your mobility can be so beneficial. And this doesn’t require much time if you focus only on the areas that need work.
Where Are the Common Mobility Problem Areas?

Joint by joint is a model developed by physical therapist Gray Cook and strength coach Mike Boyle. It’s a strategy for assessing and addressing movement problems in the body. They found that typically, there are four main areas where people tend to lack sufficient mobility:
- Shoulders
- Thoracic spine
- Hips
- Ankles
We'll focus our mobilizations on these specific areas and determine whether you could benefit from more mobility in each area.
Shoulders
Shoulders are a common problem area for mobility. Almost all men who take a shoulder mobility test fail to move well, and this expected mobility deficit is a problem. Why? Well, it's because of our compensations in the gym during our major lifts and in our daily lives during any reaching or overhead tasks, for example. These compensations can lead to pain and discomfort down the road.
So, to test for this mobility deficit, we will use Apley’s scratch test. To perform it, simply reach one arm up and over your shoulder and your other arm up your back as far as possible.
To pass, ideally, you’ll want those fingers to touch. But aim to at least get your arm to reach the top of your shoulder blade and your bottom arm to reach the bottom of your shoulder blade. If your top arm fails, then it’s likely missing adequate shoulder external rotation and abduction.
Assessing Shoulder Mobility
If your bottom arm fails, then it’s likely missing the opposite: adequate shoulder internal rotation and adduction. So do the test on both sides and see how you do. Note down which arm has the worst mobility on each side. We’ll then want to use these results to determine which specific shoulders and positions need the most work with our mobility drill to correct the imbalances.
T-Spine
We’ll move on to the mid and upper back, or, in other words, the thoracic spine. This area often stiffens due to excessive sitting and technology use throughout the day. Over time, we lose the ability to extend our back out of this hunched posture.
Assessing Posture
To test if this is a problem area for you, it’s pretty simple. Take a picture sideways in the mirror with your body relaxed. This picture may be hard to look at, but you should analyze it closely. If your mid-to-upper back seems round, that’s a good sign that it could use some mobility work.
Hips
The hips also tend to develop imbalances because of all the various positions we put them in throughout the day. Hips Mobility Test The test we’ll do here is simple.
Assessing Hip Mobility
You just need to perform a bodyweight squat. If your feet turn out excessively on the way down, your hips seem to lock at a certain depth and you can’t go below parallel, or your hips tend to shift to one side during your squat, then these are potential signs that your hips could use some more mobility work. Another indicator is that your hips just feel stiff in general.
Ankles
We need to look at the ankles. Admittedly, this is where most of the problems stem from. When our ankles lose their ability to move, it affects the rest of the body. We'll use a simple test to determine if they’re a problem area for you.
Ankle Mobility Test
Ankle mobility test perform a bodyweight squat. See how deep you can go without raising your heels or leaning forward excessively. Repeat this, but this time with weight plates or a book under each heel. See if your squat improves in terms of depth and form. If it does, I’d likely benefit from adding the next ankle mobility drill to your routine.
Pliability: Your Mobility App for Improved Movement
If you're feeling limited by pain or your ability to move, Pliability aims to complement your existing fitness routine and help you move better. Sign up today to get 7 days absolutely for free on iPhone, iPad, Android, or our website to improve flexibility, aid recovery, reduce pain, and enhance range of motion with our mobility app.
Related Reading
- Ankle Mobility Exercises
- Shoulder Mobility Exercises
- Hip Mobility Exercises
- How To Improve Flexibility
- Thoracic Mobility Exercises
- Stretch Before Or After Workout
- Wrist Mobility Exercises
- Mobility Exercises For Beginners
- Best Stretching Routine
- Back Mobility Exercises
- Lower Body Mobility Exercises
- Leg Mobility Exercises
- Mobility Exercises For Athletes
3 Key Benefits of Mobility Training

All joints in your body need to be mobile. Still, some — the hips, thoracic spine, ankles, wrists, and glenohumeral joints (which connect your arm and shoulder) — require more mobility than others, which favors stability.
According to the American Council on Exercise (ACE), those joints are often called upon to complete everyday movements (such as squatting to the ground or twisting your torso to grab a pen off the counter). In turn, keeping those joints in tip-top shape by practicing mobility exercises helps ensure you can perform basic movement patterns with ease.
Mobility Training Improves Posture and Alleviates Pain
Keeping your mobility up to snuff can help you stay injury-free. According to ACE, you need more mobility to compensate for your movement patterns when performing complex exercises, which can lead to muscle imbalances and a higher risk of injury.
The Risks of Limited Hip Abduction Mobility
Research suggests decreased range of motion during hip abduction is linked with future lower-body injuries. Plus, “if you have poor mobility and you're trying to get back into the gym, lift heavier than normal, or start something [such as] sprints, [and] if you don't have that actual control over the range of motion, you're definitely gonna be at a higher risk of injuring yourself,” explains Bethany Cook, P.T., D.P.T., S.C.S., C.S.C.S., a physical therapist and the founder and owner of Be Free MIAMI.
Mobility Exercises Enhance Joint Health and Resiliency
To top it off, mobility exercises can improve joint health and resiliency. Since joints don’t receive any nutrient-rich blood, they rely on movement to bring in synovial fluid, a thick liquid that’s primary role is to reduce friction, says Cook. “Movement almost flushes your joint,” she adds. “So what happens is you're getting rid of inflammation and then the new fluid that's coming to the joint is what's gonna bring the nutrients to nourish it.”
Mobility Training Boosts Mind-Body Connection
Mobility training increases mind-body connection. Engaging in mobility exercises allows
you to become more attuned to your body's movements and sensations. A heightened mind-body connection enhances your exercise experience and carries over to everyday activities.
What Causes Limited Mobility?

Lack of Movement: The Silent Mobility Killer
Simply moving your body too infrequently (read: not hitting the U.S. Department of Health and Human Services’ weekly recommendation of 150 minutes of moderate-intensity aerobic activity) can limit your mobility, says Lee. This is a form of mechanical tightness, in which your muscles are in a shortened position and thus may not be able to work through a full range of motion around a joint, adds Cook. That said, this type of tension can also develop due to:
- Surgery
- Injury
- Individual anatomy
Neurological Tightness: Post-Injury Tightness
Neurological tightness, which often develops post-injury, can also be to blame. In this case, your brain is telling your body not to use its full range of motion since injuries usually occur at the end of that range, says Cook. Essentially, your body is trying to prevent you from re-injuring yourself. Mobility exercises can help your body re-learn that moving your joints in all directions is safe.
Related Reading
- Golf Mobility Exercises
- Upper Body Mobility Exercises
- Mobility Exercises For Runners
- Can You Over Stretch
- Squat Mobility Exercises
- Functional Mobility Exercises
- Why Stretching Is Important
- Foot Mobility Exercises
- Arm Mobility Exercises
- Hamstring Mobility Exercises
- Elbow Mobility Exercises
- Rotator Cuff Mobility Exercises
- Bed Mobility Exercises
- What Are Mobility Exercises
19 Best Full Body Mobility Exercises
.jpeg)
1. Wrist CARs
Wrist CARs, or controlled articular rotations, are a mobility exercise that helps your brain assess any restrictions in your wrist. They also help decrease pain by moving the joint through its full range of motion. To do CARs:
- Sit in a chair or on the floor with your right arm extended in front of you, palm closed and fist facing up. Hold your right wrist with your left hand to stabilize your forearm.
- Slowly extend your fist forward so your knuckles point toward the floor.
- Slowly and with control, rotate your wrist in a circle through its full range of motion, using your left hand to keep it stable.
- Reverse the movement, then open the CARs in both directions with your right hand.
- Do 6 to 10 reps in both directions with open and closed hands. Switch sides and repeat.
2. Wrist PAILs and RAILs
If you experience wrist pain while powering through push-ups or holding a handstand, add some wrist PAILs (aka progressive angular isometric loading) and RAILs (aka regressive angular isometric loading) to your warm-up routine. These mobility exercises help your body gradually adapt to new ranges of motion.
To do wrist PAILs and RAILs:
- Start in a table-top position on the floor with hands stacked directly under your shoulders, knees bent and stacked directly under your hips, and feet hip-width apart.
- Shift weight into your hands and lean forward at your knees until your wrists are fully extended.
- Hold this stretch in your forearms for 30 seconds.
- For the PAILs, press hands and fingers down on the floor for 10 seconds.
- For the RAILs, lift fingers and palms off the floor for 10 seconds, maintaining the end range of wrist extension. That’s one rep. Do 5 to 10 reps.
3. Functional Shoulder Rotations
This mobility exercise involves moving your shoulder joint through its functional range of motion. You’ll practice movements such as reaching behind your head (which you do in real life when you’re brushing your hair) and reaching behind your lower back (which you might do to tuck your shirt into your pants).
To do this:
- Lie facedown on the floor with your legs fully extended, your right arm bent, and your right forearm resting beneath your forehead.
- Place your left hand on the back of your head, squeezing a small ball or holding a fist to create tension throughout your left arm. Your knuckles should be facing the floor.
- Engage your core, glutes, and legs.
- Lift your left elbow off the floor until your arm is parallel with the floor. Keeping your shoulder raised, lift your left fist off your head and straighten your arm.
- Keeping your left arm raised, slowly extend it out to the side and down toward your legs, rotating your shoulder as necessary, until your left fist reaches your hip or back.
- Lower your left elbow to the floor. Your knuckles should be facing the ceiling.
- Slowly reverse the movement to bring your fist back to your head and return to the starting position. That’s one rep. Do 6 to 8 reps. Switch sides and repeat.
4. Arm Bars
This scaled-down version of a Turkish get-up is ideal for improving mobility in the shoulders and thoracic spine.
- Lie faceup on the floor with your left leg extended, right knee bent, right foot planted on the floor, and left arm resting. Your right arm is extended above your shoulder, with your fist pointed straight up and a kettlebell in hand, the bell resting outside your forearm.
- Press through your right foot to slowly roll your body onto your left side.
- Lift your right foot off the ground and keep the kettlebell pressed straight above your shoulder, arm vertical, and gaze on the bell.
- Continue rolling until your right knee touches the floor.
- Pause, then slowly reverse the movement to return to the starting position.
- That's one rep. Do 6 to 10 reps.
- Switch sides and repeat.
5. Quadruped Thread the Needle
This dynamic take on the classic yoga pose helps address thoracic spine mobility, which, when limited, can cause the lumbar spine, pelvis, and shoulders to compensate as you move.
- Start in a table-top position on the floor with hands stacked directly under your shoulders, knees bent and stacked directly under your hips, and feet hip-width apart.
- Lift your left hand off the floor and lower your left shoulder down to the floor to thread your left arm underneath your chest and out to the right side of your body, rotating your torso as necessary. Continue threading until the left side of your head touches the floor.
- Slowly reverse the movement to return to the starting position.
- That’s one rep. Do 10 reps.
- Switch sides and repeat.
6. Hip CARs
A classic hip mobility exercise, hip CARs will work your joint through its full range of motion, ensuring it's well nourished and the surrounding muscles get a good stretch.
- Start in a table-top position on the floor with your hands stacked directly under your shoulders, knees bent and stacked directly under your hips, and feet hip-width apart. Grip the mat to engage your forearms and core.
- Keeping knees bent at 90-degree angles and your left foot flexed, lift your left knee off the floor and slowly drive it a few inches toward your chest.
- Then, lift your left knee out to the side and up toward the ceiling until your left thigh is parallel with the floor.
- Then, externally rotate your hip so that your left ankle is directly above your left knee, with the sole of your foot facing the ceiling.
- While keeping your sole facing the ceiling and pressing your heel, bring your knee back to center so your left thigh is straight behind your body. Then, lower your left knee to the floor with control, landing under your left hip in the starting position. Do 5 to 10 reps. Switch sides and repeat.
7. 90/90 Hip Series
This mobility exercise will leave your hips feeling completely free of tension as you’ll move them in not one but four different directions. Before starting the specific moves, warm up with a minute or two of Cook's suggested stretches.
Hip Stretch
- Sit on the floor with your right leg extended in front of your body and your left leg extended to the side.
- Bend both knees to roughly 90-degree angles and gently rest your fingertips on the floor at your sides. Your right calf should be parallel with your left thigh.
- Keeping the sides of your feet and knees on the floor, hinge at your hips and lean your torso forward to stretch the front of your hips. Hold this position for 30 seconds.
- Return your torso to the starting position. Keeping your right hand in place on the floor, lift your left hand off the floor and bring it to the right side to stretch the back of your hips. Your chest should be square with your right calf. Hold this position for 30 seconds.
- Reverse the movement to return your torso to the starting position.
Hip Series Movements
- Hinge at your hips, lean your torso forward and place your hands flat on the floor. Keep your left knee on the floor, and lift your left foot as comfortably as possible. Pause, then slowly lower your foot back to the floor.
- Return your torso to the starting position. Lift your left hand off the floor and extend your left arm to the side to align with your shoulder.
- Make a fist with your left hand to create tension throughout your body and engage your core.
- Then, lift your left knee as comfortably as possible, using your left toes as a pivot point.
- Pause, then slowly lower your knee back to the floor.
- Keeping your left arm extended at shoulder height, your left hand in a fist, and your core engaged, lift your entire left leg off the floor and bring it around to the front of your body so it's fully extended in front of your hips. Reverse the movement to return to the starting position.
- Lower your left hand back to the floor, hinge at your hips, and lean your torso forward slightly. Lift your right leg off the floor and straighten the entire leg in front of your body. Reverse the movement to return to the starting position.
- Do 5 to 8 reps of each movement. Switch sides and repeat.
8. Toe Yoga
Thanks to footwear, your feet may only get a chance to work through their full ranges of motion sometimes. But practicing a bit of toe yoga can help loosen them up. If you’re unable to move your toes separately just yet (you’ll likely need to work on your mind-body connection), hold down the toes that aren’t moving during each exercise.
- Sit on the floor with your knees bent, your feet flat on the ground, and your hands resting on your knees or sides.
- Lift both big toes off the floor while pressing the other toes down into the ground.
- Lift the other toes while pressing the big toes into the floor.
- Slowly lift each toe, one by one, off the floor, then slowly place each toe back on the ground.
- Do 10 reps of this sequence.
9. Spiderman Lunge
This exercise frees up your hip flexors, one side at a time, and loosens up your lower back muscles.
- Get into a pushup position with your hands underneath your shoulders and your legs extended. Your body should be in one straight line from head to heels.
- Lunge your right leg forward until your foot passes or nears your hand (or as close to your hand as you can get it). Keep your back knee off the floor.
- Sink into the lunge by driving your hips forward. Hold this position for five seconds. For a deeper stretch, lower your right forearm to the floor. Do not force the stretch but try to get your chest closer to the floor.
- Bring your right leg back so you’re in a pushup position.
- Repeat all three of the above steps on your left side.
- Do 5 reps on each side.
10. Child’s Pose
Now that your lower back is warm from the Spiderman lunge, you’ll open it up even more with this classic yoga pose. Your shoulders and upper back will also loosen up as you breathe into this position.
- Get on all fours with your hands set two to three inches in front of your shoulders and your knees under your hips.
- Sink back until your butt is touching your calves; keep your hands on the floor with your arms fully extended.
- Stretch your arms out and take three deep breaths.
- Come back to your starting position. Take one breath before sinking back down.
- Do this for 6 reps.
11. Couch Stretch
Few movements will stretch your quads and hip flexors like the couch stretch. Yes, it might feel more uncomfortable, but your squats and lunges will feel infinitely smoother after a couple of sets of this movement.
- Stand before a weight bench, place your right foot on the bench, laces down. Now hop forward a few inches.
- Squat down until your back knee is on the floor. The shin and thigh of your front leg should form a 90-degree angle; the hamstring and calf of your back leg should touch. You should feel a deep stretch in the quad of your right leg.
- Raise your arms overhead and hold this position.
- Do 20 seconds for each leg.
12. World's Greatest Stretch
- Start in a high plank position with a flat back and wrists under the shoulders.
- Step your right foot forward and plant it outside your right hand to achieve a deep lunge position. Your left knee can be straight or slightly bent, resting on the mat.
- Lift the right hand from the mat, bend the right elbow, and reach the left forearm toward the mat between the right foot and left hand.
- Hold this position for a second. Rotate your trunk towards the right and reach the right hand toward the sky. Hold this position for a second. That’s 1 rep.
- Repeat the sequence for 8-10 reps on the same side.
- Return to the starting position and repeat on the opposite side.
13. Cat Cows
- Start on your hands and knees with hands shoulder-width apart and knees directly below hips.
- Inhale as you pull your belly button to your spine and curve your lower back. Hold this “cow” position for 2-3 seconds.
- Slowly transition to the “cat” position by arching your back and looking up to the sky.
- Hold the “cat” position for 2-3 seconds.
- Complete 8 reps in each position.
14. Downward Dog Hip Opener
- Come into a plank position to start with your shoulders stacked over your wrists and hands.
- Push back from your hands and hike your hips up to bring yourself into a downward dog position.
- Bend your left knee towards your chest, then lift your left leg up and back behind you.
- Open up from your hip, letting your left foot fall towards your right glute.
- Reverse the movement to return to start.
- Repeat on the other side. That’s one rep.
- Complete eight reps.
15. Half Kneeling Adductor Rock
- Start in a half-kneeling position, with your left leg in front of you, knee bent, and foot planted on the ground. Your right knee rests on the ground either directly beneath your torso or slightly behind you, with an approximately 90-degree bend.
- Step your left foot out to the left and place your hands on your hips. Shift your hips toward the left and weight onto your left foot.
- Hold this position for 1-2 seconds before returning to the center.
- Repeat for 8-12 times on this side.
- Try to shift the hips a bit deeper into the range with each repetition.
- Return to the starting position and repeat on the opposite side.
16. Achilles Opener
- Start standing with both feet hip-width apart and your head facing straight-on.
- Step your right leg back and slightly bend your left knee, raising both hands over your head in a straight line.
- Hold for 30 seconds, then switch legs.
- You should feel this stretch in the back of your legs, primarily in your Achilles area.
17. Thoracic Extension
- Lie on a foam roller positioned perpendicular to your torso, under your upper back, with your feet flat on the floor.
- Clasp your hands behind your head and lift your hips off the ground.
- Gently allow your upper back to extend back over the roller. Only go as far as is comfortable. This stretch shouldn’t be painful.
- Hold the stretch for a few seconds. That’s 1 rep.
- Repeat for 10 reps, holding in different sections on the foam roller.
18. Figure 4 Windshield Wipers
- Start lying on the floor with both arms relaxed on your sides and legs straight.
- Bend your left knee and place your foot flat on the floor.
- Lift your right leg off the ground and place the right ankle on your left thigh.
- Slowly lower your legs toward the left until your left thigh touches the floor or until the point of tolerance. Hold for two seconds.
- Slowly rotate your legs toward the right until your right thigh touches the floor or until the point of tolerance.
- Hold two seconds.
- Complete 8 reps on each side.
19. Sky Squat Reaches
- Starting standing with your feet slightly wider than hip-width apart, slowly lower down to a deep squat.
- Keep both heels and forefoot on the ground. Reach across the body with your left hand and hold your right ankle.
- Reach your right arm up and away toward the ceiling and rotate your torso toward the right.
- Your gaze should follow the right arm. Hold for two seconds, then return to the center position.
- Complete 8 reps on each side.
A Full-Body Mobility Routine That Takes Just 19 Minutes

Dynamic stretching warms your body and prepares your muscles and joints for movement. This quick yet effective routine includes a warm-up, a 9-minute mobility circuit, and a cool-down. Plus, it can be done in the comfort of your home—or anywhere.
Warm-Up: Dynamic Stretching (5 minutes)
- Arm Circles: Stand with your feet hip-width apart and extend your arms to the sides. Make small circles with your arms, gradually increasing the size for 1 minute.
- Leg Swings: Hold a sturdy support and swing one leg forward and backward, then side to side for one minute. Repeat with the other leg.
- Torso Twists: Stand with your feet shoulder-width apart and gently twist your torso from side to side for 1 minute.
- Neck Circles: Carefully rotate your neck in a circular motion, clockwise and counterclockwise, 30 seconds in each direction.
The 9-Minute Full-Body Mobility Circuit
This circuit targets different areas of your body with simple yet effective exercises. Practice each movement for 1 minute before moving to the next one.
Upper Body Movements
- Shoulder Rolls: Stand with your arms relaxed at your sides and roll your shoulders forward and backward.
- Arm Swings: Extend your arms straight before you and swing them backward and forward.
- Neck Tilts: Gently tilt your head to the left and right, stretching your neck muscles.
Core and Back Movements
- Cat-Cow Stretch: On the floor on hands and knees, arch your back upward (cat) and then arch it downward (cow). Repeat slowly with the breath.
- Plank Twists: Start in a plank position and rotate hips to one side and then the other.
- Child's Pose: Kneel on the floor with big toes together and knees wide. Sit back on the heels and stretch the arms forward for a gentle back and shoulder stretch.
Lower Body Movements
- Hip Circles: Stand with hands on the hips and rotate the hips in a circular motion.
- Ankle Circles: Sit on the floor with legs extended and rotate ankles in both directions.
- Toe Touches: While standing, bend at the waist and reach for the toes to stretch the hamstrings.
Cool Down With Static Stretching and Breathing Techniques
After the circuit, take 5 minutes to cool down with static stretching and deep breathing:
- Quad Stretch: Stand and gently pull one heel toward the glutes to stretch the quadriceps. Repeat on the other side.
- Hamstring Stretch: Sit on the floor with one leg extended and the other bent. Reach for the toes to stretch your hamstrings. Repeat on the other side.
- Calf Stretch: Stand facing a wall, place one foot behind you, and press the heel into the ground to stretch the calf muscle. Repeat on the other side.
- Deep Breathing: Finish with a few moments of deep breathing to relax both body and mind. Inhale deeply through your nose, hold for a moment, and exhale slowly through your mouth. This 19-minute routine includes the whole body, promoting flexibility and mobility in all the right places. A fantastic way to start or end the day!
But before you close this tab to start your workout, we should address some final essential aspects of mobility training, such as recognizing signs of overtraining, understanding the importance of technique, and listening to your body.
Move Better, Feel Better with Pliability
If you're feeling limited by pain or your ability to move, Pliability aims to complement your existing fitness routine and help you move better. Sign up today to get 7 days absolutely for free on iPhone, iPad, Android, or our website to improve flexibility, aid recovery, reduce pain, and enhance range of motion with our mobility app.
Warning Signs in Mobility Training

Push vs. Pain: Know the Difference
Every new exercise routine pushes your body. But only some things should be pushed through. When doing mobility training, it’s crucial to distinguish between beneficial discomfort, that good push and harmful pain going too far. Stay on the lookout for signs you might be going too far, such as:
- Joint pain
- Prolonged soreness
- Decreased range of motion
- Fatigue
Don't Rush, Be Intentional
Mobility training isn’t about speed. Sure, some people might race through exercises to show off or to get the workout over with. Others may want to rush to improved performance and push their bodies too far.
Make sure you know how to do each exercise correctly in a new mobility workout routine. Proper technique minimizes the risk of strain or injury and maximizes the effectiveness of the exercise.
Mastering Controlled Movements for Optimal Mobility
As a rule, intentional and controlled movements are the way to go. Avoid jerky or sudden movements that strain muscles or joints. And be sure to pay attention to your natural range of motion and avoid forcing your body into positions it's not ready for. Improved flexibility and mobility is gradual work, not an overnight transformation.
Listen to Your Body
Perhaps the most critical aspect of mobility training is listening to your body. Your body provides signals and feedback that can guide your practice. During your mobility routine, pay attention to how your body feels. Are you experiencing discomfort, pain, or strain? Listen to these signs and adjust your exercises accordingly. Learning to be attentive to your body's signals and maintaining proper technique help to build an effective and injury-free mobility routine.
How To Track Mobility Progress

While it’s not as easy to quantify mobility as stats like running pace, you can assess your progress and check in with your body regularly to monitor developments with or without a pro. Measuring your mobility can highlight areas that are chef’s kiss and where you may need some extra help.
Work with a Trainer

They can conduct a mobility assessment and give you personalized tips.
Film Yourself Doing a Variety of Exercises
The recording can help you visually track movement progress. Watch your movement patterns over a few weeks. If you see and feel a difference in range of motion, you're on the right track.
Keep a Workout Journal
On the days you exercise, write down how your body feels, recommends Hutson. Consider the following questions and answer honestly: What can and can’t you do? How does a specific movement pattern feel? Sometimes one move can unlock a new mobility level, so it’s important to gauge how you’re feeling and work on various exercises.
Related Reading
- Gowod Vs Pliability
- Tennis Mobility Exercises
- Weighted Mobility Exercises
- Cervical Mobility Exercises
- Resistance Band Mobility Exercises
- Rib Mobility Exercises
- Glute Mobility Exercises
- Best Yoga App
- Free Apps For Stretching And Flexibility
- Mobility Apps
- Stretching Apps
- Chest Mobility Exercises
- Glute Stretches
- Gluteus Medius Stretch
- Glute Stretch
- Cervical Radiculopathy Exercises
Improve Your Flexibility with Our Mobility App Today | Get 7 Days for Free on Any Platform

Mobility training focuses on improving the soft tissue quality and range of motion of muscles and joints. The better your mobility, the better your performance. If you want to run faster, lift heavier, or improve your game, enhancing your mobility can help you achieve your goals. Flexible muscles and joints are crucial for optimal performance.
They allow for fluid, controlled movements, reducing the risk of injury and improving overall function. Increased mobility can also aid recovery between workouts by helping to alleviate soreness and improving blood flow.
.jpg)


