21 Resistance Band Mobility Exercises to Improve Your Range of Motion
.webp)
Mobility training is a critical component of any fitness routine. With proper mobility, your body can become stiff and tight, making it easier to perform everyday activities and reach your fitness goals. For example, if you struggle to get up and down from the floor, workouts that require you can be challenging, if not impossible. This is a common problem for many people, but the good news is that improving your mobility can help you move better, feel better, and perform better. Resistance band mobility exercises are a simple, effective way to boost your mobility, flexibility, and strength. You can perform these stretches and exercises anywhere, making them perfect for home workouts, trips, and busy schedules. This article will explore Resistance Band mobility exercises to enhance your everyday movement and performance in sports and fitness.
If you are looking for a more guided approach to improving your mobility, Pliability's mobility app is a great tool. The app features customizable routines to help you reach your goals and boost your flexibility, strength, and mobility.
What are Resistance Bands?
Resistance bands are elastic bands or tubes in various sizes and resistance levels. They help you strengthen or stretch your muscles. These affordable and portable workout tools are made of durable rubber or latex.
Resistance bands can improve performance in almost any sport, assist with rehabilitation from an injury, and help people of all fitness levels increase strength, flexibility, and mobility. One of the best features of resistance bands is their versatility. You can use them for strengthening and mobility exercises, making them a great tool for any fitness routine.
Types of Resistance Bands
Resistance Bands with Handles
These tube bands are primarily used for working out and building muscle strength and size. The handles provide a sturdy grip and allow for various exercises, like what you might perform in the gym with free weights or machines. Stackable resistance bands use carabiners to enable users to combine bands to increase/decrease the resistance level as needed.
Therapy Flat Resistance Bands
These are often found in therapy settings, such as physical or sports therapist offices. They are wide and flat, making them easy to wrap around your hand and adjust the length easily.
They can also be cut into smaller pieces or used to stretch. These bands are also used in Pilates programs for added resistance and can be used for general strength training.
Loop Bands
These bands are similar to therapy bands but are smaller, forming a closed loop. These are primarily used for strengthening the legs and buttocks. You will find these in most gyms and physical therapy offices. Nine reasons to use resistance bands for working out prosourcefit loop resistance bands set.
Leg & Arm Tube Resistance Bands
These closed-loop tube bands come in several variations, such as leg bands with ankle cuffs and figure-8 shapes with handles for the upper body. These are more muscle-specific and limited in the various exercises that can be performed. Nine reasons to use resistance bands for working out prosourcefit leg resistance bands.
Power & Mobility Bands
These heavy-duty loop bands are most popular for cross-training and power lifting. They are also used for stretching and correcting mobility issues, adding variable resistance to weight training, and providing pull-up assistance.
10 Benefits of Using Resistance Bands for Mobility Training
1. Same Muscle Activity, Less Chance of Injury
Resistance bands offer similar and sometimes even superior muscle activity compared to traditional weight training. The main difference between elastic bands and free weights is that bands impose less stress on the joints while providing more muscle stimulus.
This means that you can perform resistance band exercises with less chance of injury, allowing for safer training. For anyone with existing injuries or joint pain, resistance bands can allow you to continue working out and performing exercises you can’t do with dumbbells.
2. Greater Muscle Stimulus
One major difference between free weights and resistance bands is the variable resistance applied through an exercise's full range of motion. With free weights, there are parts of the movement when the muscles aren’t performing much work due to lack of gravity, such as at the top of a bicep curl.
According to Dr. Jim Stoppani, when using resistance bands, “The muscle is receiving greater resistance at its strongest point in the range of motion and therefore is receiving more adequate resistance to better stimulate strength adaptations.”
3. Stabilization/Core Activation
The constant tension from bands adds an element of required stabilization from your body to maintain form during many exercises. This also means that you must often activate your core for balance. The need to control them from snapping back into place means greater stimulation and strength through the muscle’s full range of motion, and the pull of the bands reduces your ability to cheat by using momentum.
4. Improved Strength & Athletic Performance
Power resistance bands are extremely effective for athletic training due to the increased load, variable resistance, and instability. One study from TheSportJournal.org states, “Experienced powerlifters and strength and conditioning professionals have claimed elastic band resistance combined with traditional training produces strength gains for several years.”
One test using elastic tension for back squats and bench presses demonstrated that the bench press increase was doubled, and the back squat one rep max improvement was nearly three times higher after using bands. “The resistance band group’s average lower body power increase was nearly three times better than the free-weight only group.” Research also shows that using bands with weights improves neuromuscular performance and strength more than weight training alone. These bands can also be used for speed and agility drills for various athletic purposes.
5. More Exercise Options
With dumbbells or barbells, you are limited to certain body positions in a vertical plane of motion to use the force of gravity. You can perform exercises on both the vertical and horizontal planes using resistance bands.
You can do a chest press or back row in a standing position rather than using a bench. You can also train to perform sideways movements, which is ideal for athletic activities like swinging a baseball bat or golf club and daily tasks like opening a door or moving a box.
6. Inexpensive
As mentioned in the examples above, you don't need many weights and machines because you can perform various exercises with one band. If you work out at home, a set of resistance bands can save you from buying expensive weights that also take up space.
7. Ideal for Rehabilitation
Resistance bands and tubes have been proven to improve muscle strength, size, and function in the elderly and those undergoing rehabilitation. Bands can provide very light or heavy resistance, which can be used in targeted ways for specific muscles that also protect joints.
8. Stretching & Mobility
Any tube or flat band is great for both post-workout stretches and pre-workout mobility work. Typically, you are limited during stretches by your level of flexibility and range of motion, and many effective stretches even require another person to provide pressure to the muscle.
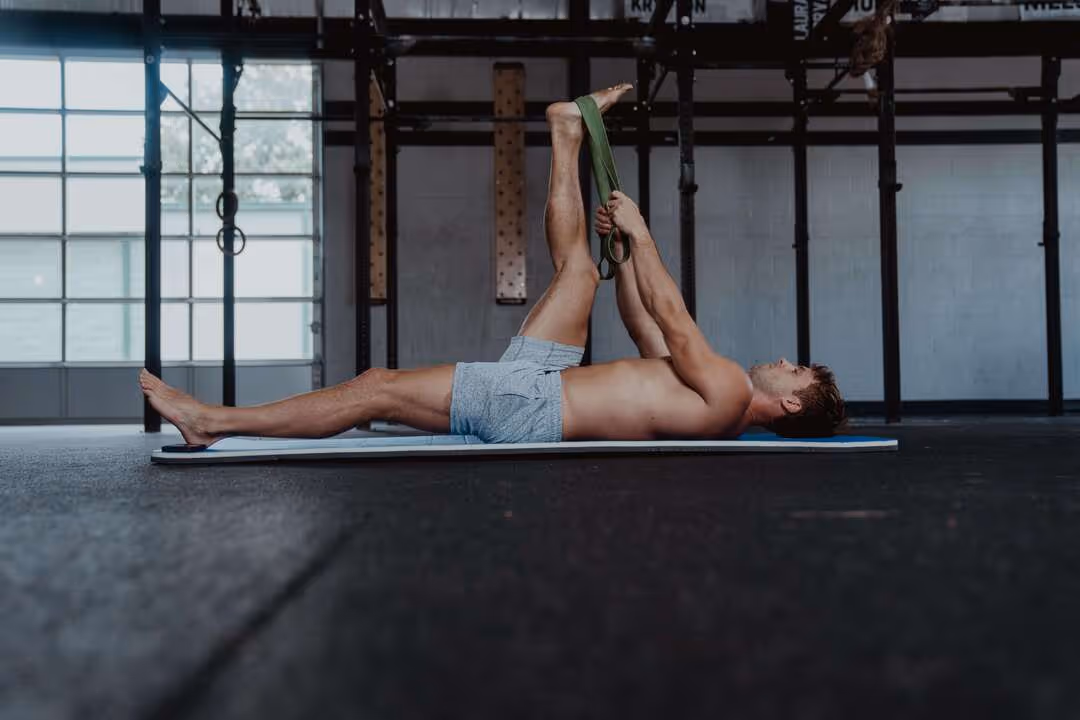
You can use bands to assist with stretching, extend your reach, and provide pressure, such as lying down hamstring stretches. Power bands are also excellent for mobility when wrapped around sturdy objects, such as improving ankle and hip mobility for squats.
9. Perfect for Travel
It can be hard to fit in workouts or even find a gym when you travel. Bands are a perfect option to pack in your bag, as they allow you to work out in a hotel room or outdoors without heavy equipment.
They won’t weigh down your luggage but will still give you an effective, full-body workout. For this same reason, they’re ideal for bodybuilders and fitness competitors, as well as models who need to pump up their muscles before a show or photo shoot.
10. Reduced Risk of Injury
Injury prevention is a key focus of mobility training with resistance bands. Individuals can reduce the risk of musculoskeletal injuries during physical activity and everyday life by improving joint:
- Mobility
- Flexibility
- Stability
Resistance band exercises target the muscles and connective tissues surrounding the joints, helping to alleviate tightness, improve alignment, and correct muscle imbalances that can lead to injury. This proactive approach prevents injuries and prepares the body for more intense physical activities by ensuring that muscles and joints are well-supported and resilient.
Mobility training with resistance bands can help individuals recover from injuries by promoting blood flow, reducing inflammation, and enhancing tissue repair. The gentle, controlled resistance provided by the bands facilitates safe rehabilitation, allowing individuals to strengthen the injured area without overloading it. This makes resistance band exercises particularly effective for managing chronic conditions such as tendinitis or bursitis.
Mobility App for Athletes and Fitness Enthusiasts
Pliability offers a fresh take on yoga tailored for performance-oriented individuals and athletes. Our app features a vast library of high-quality videos designed to:
- Improve flexibility
- Aid recovery
- Reduce pain
- Enhance range of motion
Personalized Mobility Programs for Optimal Health
Pliability provides daily-updated custom mobility programs for those interested in optimizing their health and fitness. It also includes a unique body-scanning feature to pinpoint mobility issues. If you're feeling limited by pain or your ability to move, Pliability aims to complement your fitness routine and help you move better.
Sign up today for seven days free on iPhone, iPad, Android, or our website to use our mobility app to improve flexibility, aid recovery, reduce pain, and enhance range of motion.
Related Reading
- Ankle Mobility Exercises
- Shoulder Mobility Exercises
- Hip Mobility Exercises
- How To Improve Flexibility
- Thoracic Mobility Exercises
- Stretch Before Or After Workout
- Wrist Mobility Exercises
- Mobility Exercises For Beginners
- Best Stretching Routine
- Back Mobility Exercises
- Lower Body Mobility Exercises
- Leg Mobility Exercises
- Mobility Exercises For Athletes
21 Best Resistance Band Mobility Exercises

1. Banded Pull-Apart: Your Go-To for Upper Body Mobility
- Time: 45 Sec
Region: Upper Body
Banded pull-apart target the shoulder muscles to improve upper-body mobility. To get started:
- Grab a long resistance band and hold it with both hands shoulder-widened.
- With your arms extended straight in front of you, pull the band apart while focusing on retracting your shoulder blades.
- Return to the starting position and repeat.
2. Banded Overhead Back Extension: Unlock Your Shoulders
- Time: 45 Sec
- Region: Upper Body
Banded overhead back extensions target the upper back and shoulders to improve mobility and stability in the shoulders. This exercise can help counteract the negative effects of poor posture.
To perform the exercise:
- Begin in a tall kneeling position
- Holding a resistance band with both hands
- Your grip should be slightly wider than shoulder-width
- Pull the band apart with your arms relaxed in front of you to create some tension.
- Lift your arms overhead and retract your shoulder blades to pull the band back behind your head
- Press back up to the starting position and repeat.
3. Banded Bent-Over Row to High Pull: Build Strength for Better Mobility
- Time: 45 Sec
- Region: Upper Body
This banded exercise strengthens the muscles of the upper back, improving shoulder mobility and function.
- Step on a long resistance band and grab the handles to perform the banded bent-over row to high pull.
- Hinge at the hips and pull the band toward your rib cage, keeping your elbows wide.
- Lower the band and return to the starting position.
- Repeat.
4. Banded Downward Dog to Warrior I: Dynamic Mobility for the Full Body
- Time: 45 Sec
- Region: Full Body
The banded downward dog to Warrior I is a great dynamic stretching exercise that improves hip and shoulder mobility.
- Place a mini band around your forearms to perform this exercise and get into a high plank position.
- Step your right foot forward between both hands.
- Keeping your balance, press your weight through your right leg, reaching your arms overhead and keeping tension on the band.
- This is Warrior I. Place your hands back on the floor and step your right foot back, pressing your hips back and high to return to Downward Dog.
- Lower your hips to come back into a high plank position. Repeat on the other side with your left leg.
5. Banded Superman: Target Your Back for Better Mobility
- Time: 45 Sec
- Region: Full Body
The banded superman targets the back muscles to improve strength and mobility. To perform the exercise:
- Lie on your stomach with your arms extended overhead, holding the ends of a long resistance band in each hand.
- Engaging your back and glutes, lift your chest, arms, and feet off the floor.
- Pull the band back overhead in this lifted position by retracting your back and shoulders.
- Return your arms to the extended position overhead.
- Relax back to your starting position and repeat.
6. Squat to Overhead Banded Press: Improve Lower Body and Shoulder Mobility
- Time: 45 Sec
- Region: Full Body
The squat-to-head banded press is a great exercise for improving lower body and shoulder mobility.
- Start by placing a mini band around your wrists.
- Hold your arms at 90 degrees in front of your body, keeping tension on the band.
- Squat down, pausing to press your arms overhead.
- Stand back up to return to the starting position and repeat.
7. Banded Good Morning: Activate Your Hips for Better Mobility
- Time: 45 Sec
- Region: Core and Lower Body
The banded good morning is a great exercise for improving hamstring flexibility and reducing stiffness in the lower back. To get started:
- Place a mini band around your legs right above your knees.
- Stand with your feet hip-width apart, your knees slightly bent, and your hands behind your head, your elbows wide.
- Keeping slight tension on the band, engage your core muscles and exhale as you bend at your hips, pressing your hips back rather than simply leaning forward.
- Keep your spine and neck in alignment.
- Your head should stay in a neutral position.
- Continue bending with your hips and pressing back until your hamstring muscles begin to limit your movement.
- Return to your starting position, squeezing your glutes at the top, and repeat.
8. Banded Lateral Walk: Improve Hip Mobility and Stability
- Time: 45 Sec
- Region: Core and Lower Body
Banded lateral walks are fantastic for activating the hip muscles to improve mobility and stability. To perform the exercise:
- Place a mini band around your legs right above your knees.
- Sit your hips back into a squat position.
- Keeping your feet parallel, take two steps to the right and return to standing.
- Take two steps to the left. Repeat.
9. Banded Alternating Fire Hydrant: Improve Hip Joint Mobility
- Time: 45 Sec
- Region: Core and Lower Body
The banded alternating fire hydrant is another great exercise for improving hip mobility. To perform the exercise:
- Place a mini band around your legs right above your knees.
- Get on the floor on all fours, shoulders over your wrists, and knees below your hips.
- Brace your core to flatten out your back. Keeping your gaze a few inches before your hands, lift your right knee to the right toward your hip.
- Stop at hip height or as high as you can comfortably.
- Lower your knee to the starting position and repeat on the opposite leg.
- Continue alternating legs.
10. Banded Bicycle Crunch: Increase Core Control for Better Mobility
- Time: 45 Sec
- Region: Core
The banded bicycle crunch helps to improve core strength and control. A stable core helps improve mobility by allowing the body to move efficiently and reduce excessive movement in surrounding joints. To perform the exercise:
- Place a mini band around your feet.
- Lie flat on your back with your hands behind your head.
- Contract your lower abs to raise your legs a few inches off the ground.
- Twist your torso and bend your right knee so your left elbow crosses your body and reaches your right knee.
- Now switch and twist to the other side so that your right elbow reaches toward your bent left knee.
- Keep alternating sides without tucking your chin toward your chest.
11. Front Pull Aparts: Target Your Scapular Mobility
- Time: 45 Sec
- Region: Upper Body
Front pull-aparts are a staple in your training and athletes’ programs. This exercise is straightforward to fall into the traps mentioned above by thinking it is easy. This mindset will not allow you to get the most out of the movement. If done properly, Resistance Band Front pull-aparts are one of the best ways to improve scapular mobility and strength in the back and shoulder muscles.
- Set up with a resistance band in front of you, wrists as straight as possible, shoulder blades, and rib cage down.
- When you draw the resistance band towards your body, maintain a neutral posture throughout the exercise and use your back to perform it, allowing your shoulder blades to move freely.
- Imagine your shoulders gliding along the side of your body.
- Do not allow the resistance band tension to retract to the starting position forcibly; maintain your posture and control the movement back to the beginning.
12. Shoulder Flexion: Restore Shoulder Mobility
- Time: 45 Sec
- Region: Upper Body
Resistance band shoulder flexion is your favorite resistance band movement for the upper body because of the shoulder mobility it gains. Our daily lives constantly pull our shoulders forward. Activities such as driving, doing work on the computer, and carrying around children cause our shoulders to get pulled forward and can limit mobility, especially overhead.
- Set up the resistance bands just like you do for the Front Pull Apart, and move the resistance band upwards like a front raise.
- Maintain your posture throughout the movement.
- Focus on keeping your ribcage and shoulder blades down as the resistance band gets overhead.
- Stop and reset the movement if your shoulders and ribcage move away from a neutral posture.
- Do not try to gain more false ROM by pulling the resistance band apart; rather keep the same tension on the resistance band during the movement.
13. Lateral Walks: Activate the Hip Muscles for Better Mobility
- Time: 45 Sec
- Region: Lower Body
Most lower body exercises are performed in the sagittal plane. While playing sports, we move in different planes, and activating the hip rotator muscle by training laterally is essential. Resistance band lateral walks are great for this.
You prefer a small resistance band between the legs, just above the knees. If you do not have access to a small resistance band, you can use a full resistance band by placing it under the feet and holding it up with your arms. Keep your foot and knee aligned, and take a set outward or laterally. You like to complete the step in a quarter or half squat, then bring the other foot towards the first with slow control, reset, and step again.
14. Knee Stabilizers: Train Joint Stability for Better Mobility
- Time: 45 Sec
Region: Lower Body
Resistance band exercises are a great way to train the stability of certain joints and add some isometric tension. The tension created by the resistance band creates a perturbation effect (vibration), which activates the muscles to contact and stabilize a joint during side-to-side motions common in sporting activities.
- Use a large resistance band and set up a slip knot around a squat rack or post.
- Wrap the resistance band around your thigh just above the knee, and move away from the anchor to face 90 degrees in either direction.
- When the tension feels right, bend your knee slightly and work to maintain knee and foot alignment while your quads activate to stabilize your knee joint.
- You usually like to set a timer and go for about 30 seconds.
15. Banded Hamstring Stretch: Improve Flexibility for Better Mobility
- Time: 45 Sec
- Region: Lower Body
Most people have very tight hamstrings. This exercise will help improve your hamstring flexibility, which will help you with deadlifts, squats, and sprints.
- Wrap the band around your foot.
- Grab it and pull it towards you. Try to keep your leg as straight as possible.
- Hold the stretch for 20+ seconds, then release it and repeat for 2-3 sets.
- Perform on both sides.
16. Banded Groin Stretch: Unlock Your Adductors for Better Mobility
- Time: 45 Sec
- Region: Lower Body
Many people don't realize how limited their movements are because their hip adductors are tight. This exercise will create the laxity your groin muscles need. It's also a great precursor to splits!
- While lying on the ground, swing your leg outward into a half-split.
- Pull the resistance band towards you.
- You can pull it around your back and grab it with your other hand for more tension.
- Make sure to stretch each leg thoroughly.
- Hold the stretch for 20+ seconds, then release it and repeat for 2-3 sets.
- Perform on both sides.
17. Banded Glute Stretch: Improve Your Hip Mobility
- Time: 45 Sec
- Region: Lower Body
Many people don't realize how limited their movements are because their hip adductors are tight. This exercise will create the laxity your groin muscles need. It's also a great precursor to splits. While lying on the ground, swing your leg outward into a half-split.
- Pull the resistance band towards you.
- You can pull it around your back and grab it with your other hand for more tension.
- Make sure to stretch each leg thoroughly.
- Hold the stretch for 20+ seconds, then release it and repeat for 2-3 sets.
- Perform on both sides.
18. Single-Arm Diagonal Pushes: Improve Shoulder Stability
- Time: 45 Sec
- Region: Upper Body
How to do it:
- Anchor a long band high on a door.
- Hold the ends in your left hand and turn your body away from the door.
- Step your right foot in front, then bring your left hand to the front of your.
- You left shoulder with your elbow pointing behind you.
- Inhale to anchor your shoulder blades toward your hips.
- Exhale to push the band at a downward angle in front of you. Hold for 40 seconds.
- Return to the starting position. Hold 20 seconds.
- Do a total of three sets.
19. Kickstand RDLs: Improve Hip Hinge Mechanics
- Time: 45 Sec
- Region: Lower Body
Stand with feet hip-width apart, a long loop under the arch of your right foot and over your shoulders. Use your hands to hold the band and keep it across your shoulders. Shift your head, chest, and hips over your right foot, tucking your left foot back so that your toes touch the floor.
- Your hips should be in line with each other and square.
- Inhale and aim to sit your right hip toward your left heel while keeping your weight over your right foot. This creates a slight swivel or shift in the hips that helps you access your right glute.
- Straighten your legs and stand upright to return to the starting position.
- Do three sets, 40 seconds per side, resting 20 seconds between sets.
20. Pallof Presses: Activate Your Deep Core for Better Stability
- Time: 45 Sec
- Region: Core
How to do it:
- Anchor a long band around a doorknob.
- Stand with feet slightly wider than hip-width perpendicular to the line of your band, holding the band with both hands at sternum height in the center of your body.
- Inhale, anchor your shoulder blades, exhale and push your hands straight out in front of you without letting the band pull you.
- Inhale to pull your arms in, resisting the twisting pull of the band.
- Hold for 40 seconds.
- Do a total of three sets, resting 20 seconds between sets.
21. Banded Shoulder Stretch: Improve Flexibility for Better Range of Motion
- Time: 45 Sec
- Region: Upper Body
This simple banded stretch can help improve shoulder flexibility and range of motion. To get started:
- Anchor a long resistance band at about waist height.
- Grab the free end of the band in your right hand and take a few steps away from the anchor.
- Turn your body away from the anchor so that your arm is across your body. Stand tall and relax into the stretch.
- You can also make the stretch more dynamic by gently pulling on the band to create tension and then relaxing.
- Switch sides and repeat.
33 Resistance Band Exercises You Can Do Anywhere
%20(1).jpeg)
Resistance bands are often neglected in gym settings for more glamorous equipment like dumbbells and kettlebells. Bands pack a serious punch like free weights when building muscle and toning up. Both types of equipment improve strength by creating resistance against muscle movement. While free weights can be cumbersome and require a lot of space, bands are portable and easy to store. They come in various:
- Sizes
- Lengths
- Resistance levels
Making them perfect for home use, hotel workouts, or making the most of a small space at the gym. Like free weights, exercise bands come in various resistance levels, from highly stretchable to heavy-duty strength. The most common types of bands are tube bands with handles, loop bands, and therapy bands. If you’re in doubt, a fitness professional can help determine which band is right for you, depending on your fitness level and specific workout plan. For most exercises, try aiming for 2 to 3 sets of 8 to 25 reps per exercise, ready, set, stre-e-e-etch.
Lower Body Resistance Band Exercises
1. Front Squat
Your butt, both sides of your thigh, and your hamstrings are going to thank you for this one (after they stop burning). Front squats can also provide a strength boost to your groin, hip flexors, and calves.
How to do it:
- Stand on the band with your feet slightly wider than shoulder width.
- Holding a handle, bring the band's top over each shoulder. If the band is too long, secure it by crossing your arms at your chest.
- Lower as if I’m sitting down in a chair.
- Keep your chest up, abs firm, and feet flat. Rise back up to the starting position.
- Repeat for 8–12 reps.
2. Leg Extension
Kick it up a notch with this quad builder.
How to do it:
- Anchor a loop band in a low position on a support (like an incline bench), looping the other end around your ankle with the band behind you.
- While seated, step away from the anchor to create tension on the band, and position your feet hip-width apart.
- Shift your weight to your left foot and lift your right leg from the floor.
- Extend your knee until it straightens out in front of me.
- Slowly return to the starting position.
- Repeat for 8–12 reps before switching legs.
3. Prone (Lying) Leg Curl
This one goes out to your hamstrings
How to do it:
- Lie facedown and loop a band around your right ankle, anchoring it to a stable object close to the floor for support.
- Scoot away from the anchor to create tension.
- Tighten your core and bend your leg at your knee, bringing your heel toward your glutes as comfortably as you can.
- Slowly return your leg to the starting position.
- Repeat for 10–15 reps, then switch sides.
4. Glute Bridge
Salute your glutes!
How to do it:
- Tie a band around your legs above your knees.
- Lie face up with your feet on the floor, bending your knees to 90 degrees.
- Raise your hips by contracting your glutes and applying gentle pressure outward against the band until your shoulders, hips, and knees align.
- Repeat 15–20 reps.
5. Standing Adduction
The adductor movement stands tall for boosting your hips, groin, and inner thigh.
How to do it:
- Anchor a loop band at ankle height to support and stand with your right side facing the support, wrapping the free end around your right (outer) ankle.
- Stand perpendicular to the band and step away from the support to create some tension.
- From a wide stance, get into a quarter squat.
- Pull your right leg toward your left, working against the resistance.
- Slowly return to the starting position.
- Repeat for 12–15 reps before switching sides.
6. Clamshell
Loosen up your external hip rotators and improve your movement and flexibility. This Lizzo & Missy Elliott tune isn’t going to dance to itself.
How to do it:
- Loop a band around your legs above your knees.
- Lie on your side with your hips and knees flexed to 90 degrees.
- Keeping your feet together, pull your knees away from each other while contracting your glutes for 2–3 seconds.
- Slowly return to the starting position.
- Repeat, aiming for 10–12 reps.
7. Plantar Flexion
Improving your ankle flexibility might not be on your to-do list, but if you keep them limber, they’ll give you fewer problems further down the line. Even better news, you can take a load off for this one.
How to do it:
- Sit on the floor with one leg straight out in front of me, one bent.
- Hold both ends of a resistance band, wrapping the middle around the ball of your foot.
- Sit up straight and flex your foot forward by pointing your toes away.
- Bring your toes back up in a controlled movement, flexing them toward your knee as far as it’s comfortable.
- Slowly return to the starting position. Do 10–12 reps on each side.
8. Lateral Band Walk
Don’t sidestep these side steps!
How to do it:
- Step into a loop band or tie a therapy band around your lower legs, just above your ankles.
- Place your feet shoulder-width apart to create tension on the band.
- Start in a half-squat position.
- Shift your weight to your left, stepping sideways with your right leg.
- Move your standing leg slightly in, but keep the band taut.
- Take 8–10 steps before heading back the other way.
9. Standing Abduction
This one’s a bit of a balancing act. It’s great for your glutes, though.
How to do it:
- Wrap a loop band around your legs at ankle height.
- Lift your working leg, slowly bringing your foot out to the side.
- Keep your foot pointed forward and lead with your heel to engage your glutes.
- Grab a support (like the wall or the back of a chair) if you feel wobbly.
- Lower back down to the starting position.
- Repeat for 15–20 reps on each side.
10. Seated Abduction
To really show your thighs who’s boss, try a seated abduction. It takes all the chill out of sitting down.
How to do it:
- Sit at the edge of a chair or bench and tie a loop band around both legs, just above your knees.
- Place your feet slightly wider than your shoulders.
- Slowly press your knees out, keeping your feet steady as your legs move apart.
- Hold for 2 seconds, then bring your knees back together.
- Aim for 15–20 reps.
Arm Resistance Band Exercises
11. Concentration Curl
Want to get ready for the gun show? This will get your biceps pumped.
How to do it:
- Start in a forward lunge position, your right leg in front, and place the middle of the band under your right foot.
- Grasp one end of the loop band with your right hand, resting your elbow on the inside of your knee.
- With your palm facing away from your knee, curl the band up toward your shoulder, squeezing your biceps at the top.
- Slowly lower the band back down. Repeat for 8–10 reps before switching sides.
12. Standing Biceps Curl
Also great for your ‘ceps, this is like lifting weights but this resistance is the weight. Crazy.
How to do it:
- Stand with your feet shoulder-width apart and placed over the middle of the band.
- Grab a handle in each hand, starting with your arms down at your sides.
- With your palms facing me, pull your arms toward your shoulders by bending at your elbow until you get a good bicep contraction.
- Slowly lower back down.
- Do 12–15 curls.
13. Triceps Kickback
Kick back and relax. Just kidding!
How to do it:
- Stand in a forward bend position with your feet together, over the band's center.
- Holding each end of the band, position your arms at your sides with your palms facing behind me.
- Bend at your elbows (keeping them tucked by your sides) until your forearms parallel the floor.
- Press down your arms, pushing the band behind your body until your arms fully extend.
- Lower back down.
- Repeat for 8–10 reps.
14. Overhead Triceps Extension
Become a triceps-ratops, because biceps can’t hang out by themselves.
How to do it:
- Sit on a chair or bench, placing the center of a tube band beneath your glutes.
- Grab a handle in each hand and stretch your arms up, bending your elbows to position your hands behind your neck.
- Press your arms straight up with your palms facing the ceiling until they fully extend.
- Lower back down.
- Repeat for 10–12 reps before switching sides.
Core Resistance Band Exercises
Get right to the center of things with these intense exercises.
15. Kneeling Crunch
Use the top of a door for rocking your core.
How to do it:
- Attach the band to a high anchor (such as the top of a door or cable column) and kneel facing away from the anchor.
- Grab each side of the band and pull over the shoulder with elbows bent.
- Extend your elbows at shoulder level, engage your core, and crunch toward your hips while contracting your abs.
- Slowly return to the starting position.
- Repeat for 10–12 reps.
16. Woodchopper
Get your abs turning and burning.
How to do it:
- Anchor the loop or tube band near the top of a cable column or support.
- With your right side toward the support, grab the free end of the band with your arms stretched out overhead.
- In one smooth motion, pull the band down and diagonally across your body to the front of your knees while rotating your right hip and pivoting your left foot.
- Slowly return to the starting position.
- Repeat for 8–10 reps on each side.
17. Anti-Rotation Band Walkout
Know when to walk away. Slowly.
How to do it:
- Anchor a loop or tube band slightly below your chest on a cable column or support.
- Grasping the free end, create tension on the band and squat slightly.
- Hold the band with both hands straight out in front of your chest, and keep your core tight.
- Step laterally until the band is too tense to go any further.
- Slowly and controlled, move back toward the column to the starting position.
- Repeat for 6–8 reps on each side.
18. Reverse Crunch
Now flip and reverse it (Missy stays winning throughout this article).
How to do it:
- Anchor the band on a low support.
- Lie faceup, bending your knees 90 degrees.
- Wrap the band around the tops of both feet and scoot back to create tension.
- With your abs tight and your back flat, contract your abdominal muscles to curl your lower body toward your shoulders.
- Lift your hips off the ground to pull your knees closer to your chest.
- Slowly return to the starting position.
- Repeat for 12–15 reps.
19. Russian Twist
Dasvidanya, un-toned abs!
How to do it:
- Sit on the floor with your legs extended, wrapping the center of the band around the bottom of your feet.
- Hold the free ends together in both hands.
- Slightly bend your knees, keep your feet on the floor, and lean back at a 45-degree angle.
- Rotate the band right by bringing your left hand across your body and your right hand down by your right hip.
- Contracting your oblique muscles, bring the band toward your right hip while keeping your middle and low back neutral.
- Return to the starting position.
- Rotate left then right for a total of 10–12 reps on each side.
Back Resistance Band Exercises
Back your talk and get toning.
20. Bent-Over Row
You can do it, put your back into it.
How to do it:
- Stand over the center of the band with your feet shoulder-width apart.
- Bend slightly at your knees and hinge at your waist, keeping your hips back.
- Grasp the band handles with your hands facing the outsides of your knees.
- Pull the band up toward your hips with your elbows bent, squeezing your shoulder blades together until your elbows form a 90-degree angle.
- Lower and row for 10–12 reps.
21. Seated Row
Take a seat, but don’t get too cozy. With your legs extended, place the center of the band behind the soles of your feet.
How to do it:
- Grab the band with both hands, your arms extended and your palms facing each other.
- Sitting nice and tall, bend at your elbows and pull the band toward your core, squeezing your shoulder blades together.
- Feel free to bend your knees slightly if it helps me sit up tall.
- Slowly return to the starting position.
- Do 10–12 reps.
22. Pull Apart
This should be a part of your workout for stable shoulders and improved mobility.
How to do it:
- Stand with your knees slightly bent and your feet shoulder-width apart.
- Grip the middle section of the band with both your hands at shoulder level, shoulder-width apart, and palms facing down.
- Keeping your arms straight, pull the band out and back until your shoulder blades contract.
- Slowly return to the starting position.
- Stretch, squeeze, and release for 8–10 reps.
23. Lying Pullover
No, this doesn’t involve pulling the covers over your head, but it's a nice try.
How to do it:
- For this effective pec and lat exercise, anchor the tube band in a low position.
- Lie face with your head toward the anchor, grabbing the free end of the band with both hands and stretching your arms straight out overhead.
- Move away from the anchor to create some tension.
- Pull the band overhead with slightly bent elbows, crossing your torso until the handle reaches your knees.
- Slowly return to the starting position. Keep it up for 8–10 reps.
24. Lat Pulldown
Ready to work your upper back?
How to do it:
- Anchor the band overhead to a horizontal bar (or even a sturdy tree limb).
- Kneel facing the anchor so the band is positioned in front of me.
- Grip each end with your arms extended overhead and your hands slightly wider than shoulder width.
- Pull the band down toward the floor, bending your elbows while contracting your back muscles.
- Slowly raise your hands back to the starting position once your hands reach your shoulders.
- Rock out 10–12 reps.
Chest Resistance Band Exercises
For barrel pecs, look no further.
25. Push-Up
Take this classic move to a new level.
How to do it:
- Get in a plank position, draping the resistance band across your upper back.
- Loop the ends of the band around your palms, and place your hands on the floor in the starting position, facing toward the floor.
- Contract your glutes and abs, then push straight up until your arms fully extend.
- Lower back down, your chest to the floor.
- See what I’ve got for 5–20 reps (depending on your strength).
26. Incline Chest Press
Next up: your upper chest muscles!
How to do it:
- Start seated with the middle of your band around an anchor behind you.
- Grabbing a handle in each hand, bring the band to shoulder level.
- Press the bands upward straight above your chest until your arms fully extend.
- Lower back down.
- Repeat for 10–12 reps.
27. Bench Press
No barbell? No problem! Resistance bands are at hand to save the day.
How to do it:
- Anchor a tube band on the bench legs and lie faceup on the bench.
- Grab a handle in each hand.
- Position your hands at shoulder height (so your thumbs touch the front of your shoulders).
- Extend your arms over your chest to full extension, moving your hands toward each other at the top.
- Lower back down.
- Repeat for 10–12 reps.
28. Standing Chest Press
You don’t need a gym to boost your chest game.
How to do it:
- Anchor the tube band on a cable column or sturdy support at chest height.
- Grab each handle with your back to the band.
- Step forward to reduce the slack, positioning your hands at chest height.
- Press the band straight out before me with your elbows up and your palms facing down until your arms fully extend and squeeze your chest muscles.
- Return to the starting position. Press on for 12–15 reps.
Shoulder Resistance Band Exercises
Stand shoulder-to-shoulder with the greats.
29. Overhead Press
This one might go over your head (in fact, it definitely should).
How to do it:
- Stand over the center of a tube band with your feet shoulder-width apart.
- Grip each handle, positioning your hands at shoulder level with your palms straight forward so your thumbs touch your shoulders.
- Press straight up to extend your arms fully.
- Lower back down slowly.
- Repeat for 8–10 reps.
30. Forward Raise
This one is fantastic for the front of your shoulders, so get to know it.
How to do it:
- To hit the front of your shoulders, stand on the middle of the band with your feet shoulder-width apart.
- Grip the handles at your sides with your palms facing back, thumbs pointing inward.
- Bring your right arm straight before me to shoulder height without locking your elbows.
- Slowly lower back down.
- Raise the roof for 8–12 reps before switching arms.
31. Lateral Raise
Build bolder shoulders with this isolation move.
How to do it:
- Stand with your feet shoulder-width apart over the center of a tube band.
- Grip each handle with your arms down at your sides and your palms facing in.
- Bend your elbows slightly, and raise your arms straight to the sides and shoulder level.
- Slowly lower back down.
- Go for 8–10 reps.
32. Upright Row
Stand proud as you target your traps.
How to do it:
- With your feet positioned over the center of the band, shoulder-width apart, grip the band handles with your palms toward me and position them just in front of your thighs.
- Use your elbows to pull the band straight up the front of your body to shoulder level, keeping your elbows bent and positioned in a high V.
- Slowly lower back down to the starting position.
- Keep rowing for 10–12 reps.
33. Bent-Over Rear Delt Fly
Target your whole shoulder with this fierce move.
How to do it:
- Stand, positioning your feet over the middle of the band.
- Cross the band at your knees, grabbing the handles with your palms facing each other.
- Bend forward at your waist, your back straight, and raise your arms straight to your sides until the band reaches shoulder level.
- Lower back to the starting position.
- Fly away with 10–12 reps.
Related Reading
- Golf Mobility Exercises
- Upper Body Mobility Exercises
- Mobility Exercises For Runners
- Can You Over Stretch
- Squat Mobility Exercises
- Functional Mobility Exercises
- Why Stretching Is Important
- Foot Mobility Exercises
- Arm Mobility Exercises
- Hamstring Mobility Exercises
- Elbow Mobility Exercises
- Rotator Cuff Mobility Exercises
- Bed Mobility Exercises
- What Are Mobility Exercises
- Full Body Mobility Exercises
How to Use Resistance Bands Correctly: A Beginner’s Guide
Start your resistance band training journey by finding the right one for you. Resistance bands come in various:
- Sizes
- Shapes
- Colors
Each color typically corresponds with a different resistance level. It’s a good idea to begin with a combination package that includes a variety of resistance weights:
- Light
- Medium
- Hard
You will need varying degrees of tension to complete the desired number of sets and repetitions for each exercise.
Having various weights gives you the flexibility to swap what you’re using if you find the exercise is too easy (or too difficult). Some bands also have handles on them, which can make them easier to use. Some types of bands work best for specific exercises. For example, fabric mini loops may work better for exercises where the band is looped around your thighs because they don’t roll up like rubber bands may do. But rubber bands are easier to use around the arches of your feet or wrists.
Secure Those Bands! How to Anchor Resistance Bands
Learn to securely anchor the bands (if necessary) before starting. Some exercises require you to attach the band to an anchor point, while others do not. For example, if you’re looping the band around your thighs to perform side steps, you can secure the band around your legs without additional equipment.
You must attach the band to a sturdy anchor point for seated rows. Most resistance bands have instructions on properly securing them to an anchor point to avoid injury. A few tips to keep in mind include:
- Look for a sturdy, stable anchor point to support your weight and any additional resistance.
- Always check the band before using it to ensure it’s not frayed or damaged.
- Ensure the band is securely anchored before starting the exercise to avoid snapping or losing control of the band.
- Avoid using the bands outdoors, as debris can damage them.
Keeping It Tense: Maintaining Tension Throughout the Movement
One crucial tip for getting the most out of resistance band training is maintaining tension throughout the movement. Unlike traditional weights, resistance bands are heavy once you stretch them.
This means that if you allow the band to go slack at any point during the exercise, you could be putting yourself at risk for injury and not effectively working your muscles. Moving slowly and with control will help you avoid injury and get the most out of your workout.
Common Mistakes to Avoid When Using Resistance Bands
As with any exercise, there are common mistakes to avoid when using resistance bands. Here are a few to keep in mind:
- Overstretching: Like any other exercise equipment, resistance bands have limits. Stretching a band too far can cause it to snap, which could lead to injury. Always check the band before using it to ensure it’s not frayed or damaged.
- Improper grip: Resistance bands can slip or roll during use, especially if you grip them incorrectly. Make sure you’re holding the band firmly, and if it’s moving or shifting during use, stop and adjust your grip to avoid injury.
- Jerky movements: When using resistance bands, always move slowly and with control to avoid injury. Aim to keep tension on the band throughout the entire movement and avoid letting it go slack at any point.
Safety Tips for Resistance Band Training
Like any other type of exercise, it’s important to use resistance bands safely to avoid injury.
Here are a few tips to keep in mind:
- Always inspect the band before using it to ensure no visible signs of wear and tear.
- Avoid using resistance bands outdoors, as debris can damage them.
- Make sure to securely anchor the band before starting the exercise if needed.
- Use a slow and controlled motion throughout the exercise.
- Stop immediately if you feel pain or discomfort.
Related Reading
- Gowod Vs Pliability
- Tennis Mobility Exercises
- Weighted Mobility Exercises
- Cervical Mobility Exercises
- Rib Mobility Exercises
- Glute Mobility Exercises
- Best Yoga App
- Free Apps For Stretching And Flexibility
- Mobility Apps
- Stretching Apps
- Chest Mobility Exercises
- Glute Stretches
- Gluteus Medius Stretch
- Glute Stretch
- Cervical Radiculopathy Exercises
Improve Your Flexibility with Our Mobility App Today | Get 7 Days for Free on Any Platform
Pliability offers a fresh take on yoga tailored for performance-oriented individuals and athletes. Our app features a vast library of high-quality videos designed to:
- Improve flexibility
- Aid recovery
- Reduce pain
- Enhance range of motion
Personalized Mobility Programs for Optimal Health
Pliability provides daily-updated custom mobility programs for those interested in optimizing their health and fitness. It also includes a unique body-scanning feature to pinpoint mobility issues. If you're feeling limited by pain or your ability to move, Pliability aims to complement your fitness routine and help you move better.
Sign up today for seven days free on iPhone, iPad, Android, or our website to use our mobility app to improve flexibility, aid recovery, reduce pain, and enhance range of motion.
.jpg)


