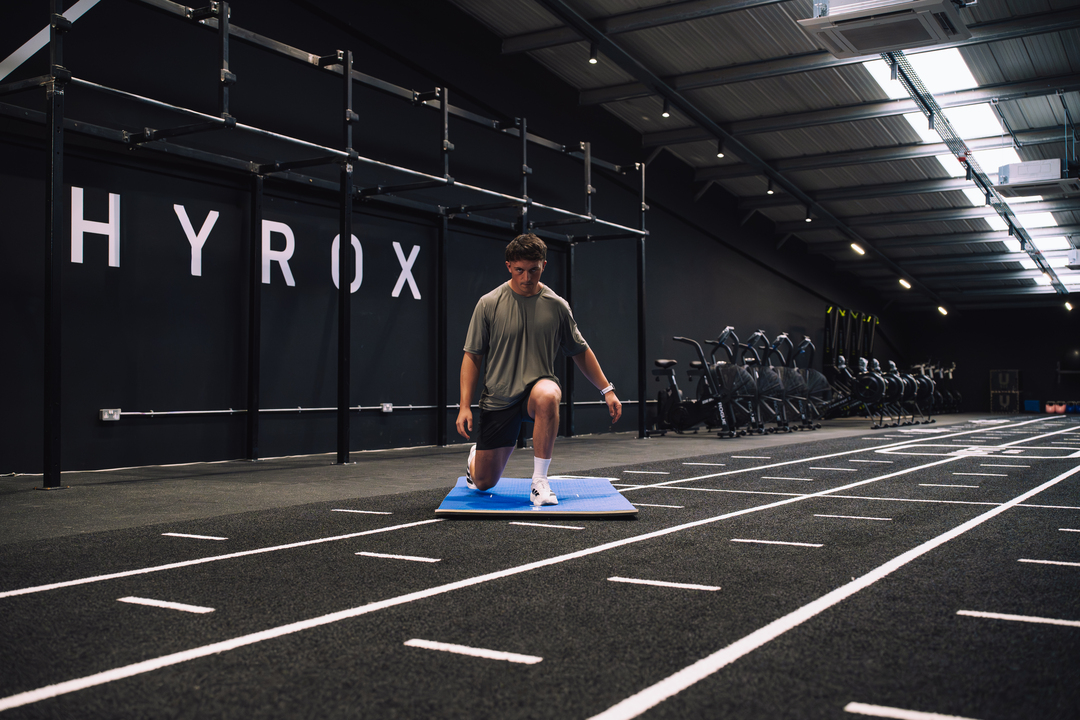
How to Heal a Calf Strain Quickly and Prevent Re-Injury
.webp)
You're moving through your day when suddenly a sharp pain shoots through your lower leg. Whether you pushed too hard during a run, jumped back into sports after time off, or simply took an awkward step, a calf strain can stop you in your tracks and leave you wondering how long recovery will take. This article will show you how to heal a calf strain quickly while rebuilding strength safely and preventing future injuries, so you can return to the activities you love without fear of setbacks.
That's where a mobility app like Pliability becomes your recovery partner. Through guided movements and targeted exercises designed specifically for calf strain recovery, you'll learn the exact techniques to reduce pain, restore flexibility, and strengthen the injured muscle tissue at the right pace. The app walks you through each phase of healing, from those first careful days to full strength training, giving you the confidence that comes from knowing you're doing what actually works.
Summary
- Calf strains account for 10% to 55% of all sports medicine injuries and rank among the four most frequently affected muscle groups according to sports medicine data. The injury happens when muscle fibers tear from forces they can't handle, typically during explosive movements like sprinting, jumping, or sudden pivots.
- The first 48 to 72 hours determine whether recovery proceeds smoothly or becomes prolonged. Immediate ice application, compression, and elevation control inflammation and prevent secondary damage, but complete rest creates new problems, including muscle atrophy and disorganized scar tissue formation.
- Recovery timelines depend entirely on injury grade, and pain reduction doesn't equal full healing. Grade 1 strains may feel better within a week, but returning to intense activity before the tissue regains strength can convert minor injuries into serious ones. Grade 2 strains require four weeks of active rehabilitation with progressive loading, while Grade 3 complete tears often need surgery followed by months of physical therapy.
- Eccentric exercise strengthens the muscle's ability to contract while lengthening, which prepares the tissue for the demands that initially caused the injury. Eccentric heel drops, performed by raising on both feet, then slowly lowering the injured heel over 5 to 6 seconds, build resilient tissue that resists tearing during running and jumping.
- Most self-directed recoveries fail because generic advice like "gentle stretching" and "progressive loading" leaves too much room for interpretation. The gap between knowing general principles and executing specific daily programming creates cycles in which people either do too little and develop chronic stiffness or push too hard and reinjure themselves.
Pliability's mobility app provides structured video routines designed specifically for each calf strain recovery phase, from early range-of-motion work when tissue is fragile to loaded strength movements when you're ready to return to sport.
What Causes a Calf Strain and How to Tell How Severe It Is
A calf strain happens when the muscle fibers in your lower leg tear because they've been stretched or loaded beyond what they can handle. That sharp, sudden pain you feel at the back of your leg between your knee and ankle isn't just discomfort. It's your body signaling that tissue has actually torn, and continuing to push through it will only make the damage worse.
The Mechanics of a Calf Tear
The mechanism is usually sudden and specific. Quick pivots during basketball, explosive sprints in soccer, abrupt stops while running, or even that awkward lunge to catch something falling. Your calf muscles work by pulling your heel upward to push your foot backward, a movement called plantar flexion that drives every step you take.
When those muscles are forced into an overstretched position while contracting (like when your toes are pushed upward toward your body while you're trying to push off), the fibers can't withstand the opposing forces, and they tear.
High-Intensity Stress on the Calf
High-intensity sports create the perfect storm for calf strains. Sprinting, jumping, and pivoting all of these load your calf muscles heavily while putting them through rapid position changes.
Add in tight muscles from skipped warmups or fatigue from overtraining, and you've set the stage for injury. According to the Cleveland Clinic, Grade 1 calf strain involves less than 5% of muscle fibers, but that small percentage is enough to sideline you if you ignore it.
Inside Your Calves
Your calf isn't one muscle. It's three distinct muscles working together, and understanding this matters because a strain can affect one, two, or all three, depending on how the injury happened.
The Power Muscle of the Calf
The gastrocnemius is the largest and most powerful, the muscle you see when someone flexes their calf. It has two heads that originate from the lower part of your thighbone and merge down into the Achilles tendon. This muscle crosses both your knee and ankle joints, which makes it vulnerable during movements that involve both joints simultaneously.
The Deep Calf Muscle
The soleus sits deeper, underneath the gastrocnemius. It originates from the upper parts of your shinbone and joins the gastrocnemius at the Achilles tendon. Because it only crosses the ankle joint, it handles loading patterns differently from the gastrocnemius, particularly during sustained standing or slower movements.
The Often-Overlooked Plantaris Muscle
The plantaris is small and often overlooked. It's a short, slender muscle on the upper part of your lower leg that narrows into a long tendon extending down to join the Achilles. Some people don't even have one, and when it tears, it's often mistaken for a more serious gastrocnemius injury.
When you strain your calf, the injury location and which muscles are involved will affect your symptoms, recovery timeline, and the specific movements that hurt most.
How to Tell What You're Dealing With
Most people know something's wrong immediately. That snapping or popping sensation, the sudden inability to continue your activity, the sharp pain that makes you stop mid-stride. What's harder is figuring out whether you've got a mild strain that needs a few days of careful movement or a severe tear that requires medical intervention.
Grade 1 Strains Involve Minimal Fiber Tearing
You'll feel discomfort and tightness, but you can still walk relatively normally. There's usually no visible swelling or bruising. The pain is there, especially when you flex your ankle or try to stand on your toes, but it's manageable.
Many people with Grade 1 strains mistakenly think they can push through it because the loss of function feels minimal. That's exactly when small injuries become bigger ones.
Grade 2 Strains Hurt More and Limit You More
You'll have moderate pain that makes running or jumping impossible. Swelling appears within hours, often accompanied by bruising as blood from torn fibers spreads under the skin. Your strength and range of motion drop noticeably.
Walking is possible but uncomfortable, and you'll likely favor the injured leg without thinking about it. Recovery here takes commitment, usually around four weeks with proper rehabilitation.
Grade 3 Strains are Unmistakable
Severe pain, inability to walk without significant difficulty, frequent muscle spasms, substantial swelling, and heavy bruising. In some cases, you can actually see a deformity where the muscle has completely torn and bunched up. If you're experiencing pain while sitting, at rest, or at night, you're likely dealing with a Grade 3 strain that needs immediate medical attention.
How to Gauge Calf Injury Severity
The practical signs matter more than trying to diagnose yourself with precision:
- Can you walk normally, or are you limping?
- Is there visible swelling or bruising?
- Can you stand on your toes on the injured leg?
- Does the pain stop you from basic movements or just make them uncomfortable?
These observations help you understand severity without needing an MRI.
A Very Common Sports Injury
People often underestimate how common calf strains are. Muscle injuries make up between 10% and 55% of all sports medicine injuries, and calves rank among the four most frequently affected muscle groups. You're not alone, and the injury isn't a reflection of your fitness level or athletic ability. It's a mechanical problem that occurs when force exceeds the tissue's capacity.
What Recovery Actually Looks Like
Recovery timelines depend entirely on severity, and this is where expectations need to align with reality. "Quickly" means different things depending on the grade of injury.
Why Grade 1 Strains Still Need Rest
For Grade 1 strains, you might feel mostly better within a week, but that doesn't mean you should return to full activity. The fibers are still healing, and the tissue is vulnerable. Jumping back into intense training too soon is how Grade 1 strains become Grade 2 injuries. Even with minimal functional loss, you need to protect the area and gradually rebuild tolerance.
Why Grade 2 Calf Strains Need Active Rehab
Grade 2 strains require patience. Four weeks is the typical healing timeline, but that's four weeks of active rehabilitation, not four weeks of sitting around hoping it gets better.
The muscle needs gentle movement to prevent stiffness, progressive loading to rebuild strength, and careful monitoring to avoid setbacks. An exercise program guided by a physiotherapist is essential here, as the line between helpful stress and harmful overload is narrow.
Grade 3 Calf Strains: Surgery and Rehab
Grade 3 strains often require surgery to reattach completely torn muscle fibers. After surgery, the muscle is immobilized for 4 to 6 weeks, followed by intensive physical rehabilitation that can take months. This isn't a quick recovery, and trying to rush it leads to incomplete healing and chronic weakness.
Why Early Return Increases Calf Injury Risk
The challenge is that most people want to return to their sport or activity as soon as the pain subsides. Pain reduction doesn't equal full healing.
The muscle fibers need time not just reconnect but to regain their strength and elasticity. Returning too early, even when it feels manageable, sets you up for recurrence because the tissue hasn't rebuilt its capacity to handle the loads you're about to put on it.
The First Steps Matter Most
The initial response to a calf strain shapes everything that follows. The R.I.C.E. protocol (Rest, Ice, Compression, Elevation) isn't just first aid advice. It's a strategy to minimize secondary damage, control inflammation, and create the conditions for healing to begin.
- Rest doesn't mean complete immobilization for weeks. It means protecting the injured tissue from forces that could extend the tear while maintaining gentle movement to prevent stiffness and promote blood flow.
- Ice reduces pain and controls swelling in the first 48 to 72 hours.
- Compression provides support and limits fluid accumulation.
- Elevation helps drain excess fluid away from the injury site.
Maintaining Flexibility During Healing
After the acute phase passes, gentle targeted stretches become important. These aren't aggressive flexibility sessions. They're careful movements designed to maintain the range of motion and prevent the muscle from tightening up as it heals. Tight muscles heal slowly, and short muscles are weak muscles that strain easily.
Progressive Strength Training for Calf Recovery
Strength training comes into play once pain subsides, but it must be progressive and specific. You're not just rebuilding the strength you lost. You're improving the muscle's efficiency and tolerance so it can handle the demands you'll place on it when you return to activity.
This is where many self-directed recoveries fall apart, because knowing which exercises to do, in what order, and at what intensity requires expertise most people don't have.
The Limits of Generic Calf Strain Advice
Traditional recovery approaches often rely on generic advice and guesswork. You're told to rest, ice it, and "take it easy," but what does that actually mean day to day? How do you know when to progress from rest to movement, from gentle stretches to strength work, from bodyweight exercises to loaded training?
The gap between general guidance and specific, personalized progression is where recoveries stall or injuries recur.
Pliability: Guided Recovery for Calf Strains
Pliability approaches calf strain recovery differently by providing guided movement progressions tailored to each phase of healing. The app walks you through targeted exercises that match your current capacity, from those first, careful days when even gentle movement feels risky to full-strength training when you're ready to return to sport.
You're not guessing whether you're doing too much or too little. You're following expert-designed programming that adapts to your current stage of recovery.
Related Reading
- Injury Prevention Strategies
- What is Injury Prevention
- Cold Therapy for Athletes
- Can Tennis Elbow Cause Shoulder Pain
- Basketball Injury Prevention
- How to Prevent Pickleball Injuries
- How To Stop Wrist Pain From Lifting Weights
- Most Common Tennis Injuries
- How to Prevent Knee Pain When Running
- How Can You Prevent Injury While Cycling
- Injury Prevention for Athletes
What Should I Do Immediately After a Calf Strain?
The first 48 to 72 hours determine whether your calf strain heals cleanly or becomes a prolonged struggle. Your immediate response should focus on controlling inflammation, protecting damaged tissue from further tearing, and creating conditions that allow healing to start without interference. This window closes faster than most people expect, and the actions you take (or don't take) during this period shape your entire recovery trajectory.
Stop Moving and Assess
The moment you feel that sharp pain or popping sensation in your calf, stop whatever you're doing. Not in five minutes. Not after you finish the drill or get to the sideline. Immediately. Continuing to load a freshly torn muscle can further damage it. Each additional contraction pulls apart fibers that are already compromised, turning a small tear into a larger one.
Assessing Your Calf Injury Before Seeking Help
Once you've stopped, assess what you're dealing with.
- Can you put weight on the leg without severe pain?
- Is there immediate swelling or visible bruising?
- Can you flex your ankle up and down, or does the movement feel blocked or excruciating?
These observations tell you whether you're managing this yourself or heading to urgent care.
Red Flags Indicating a Severe Calf Tear
If you can't bear weight, if you see rapid swelling, if the pain is severe even at rest, or if you notice a visible deformity in the muscle, you need medical evaluation now. These signs suggest a Grade 3 tear that may require imaging and potentially surgical intervention. Waiting until tomorrow or trying to "see if it gets better" wastes the most critical hours of your recovery.
Immediate Care for Mild Calf Strains
For less severe strains, your immediate job is damage control. Sit or lie down. Elevate the leg above heart level if possible. Remove tight footwear before swelling makes it painful. The goal is to temporarily reduce blood flow to the area, thereby limiting the inflammatory response and preventing excessive fluid accumulation that can create pressure and pain.
Ice, Compression, and Elevation Work (When Done Right)
Ice reduces tissue temperature, slowing metabolic activity and decreasing the inflammatory chemicals that flood the injury site. This matters because while inflammation is part of healing, excessive inflammation can cause secondary damage and prolong recovery.
Apply ice for 15 to 20 minutes every two to three hours during the first 48 hours. Use a barrier, such as a thin towel, between the ice and the skin to prevent ice burns. The tissue should feel cold and slightly numb, not painful.
Using Compression for Calf Strains
Compression provides external support that limits swelling and stabilizes the muscle. Use an elastic bandage wrapped from your ankle upward toward your knee, firm enough to provide support but not so tight as to cut off circulation. If your toes start tingling, turning blue, or feeling numb, you've wrapped too tightly. The compression should feel snug and supportive, not restrictive.
Elevation to Reduce Swelling in Calf Strains
Elevation uses gravity to drain excess fluid away from the injury. Prop your leg on pillows so your calf is higher than your heart. This position encourages fluid to flow back toward your core rather than pooling in your lower leg, which reduces pressure and pain. Combine elevation with ice and compression for maximum effect during those critical first hours.
Why Too Much Rest Can Hinder Calf Recovery
One person spent two months lying down for 20 hours a day after a disc injury, thinking more rest meant faster healing. Instead, the excessive immobility created new problems, such as circulation issues, muscle loss, and secondary pain in areas that weren't originally injured.
The lesson translates directly to calf strains. Rest protects the injury, but too much rest weakens surrounding structures and slows recovery. You need strategic rest, not total shutdown.
What Not to Do
Heat feels soothing, but applying it within the first 72 hours increases blood flow to damaged tissue, which can amplify swelling and pain. Save heat for later stages of recovery when inflammation has subsided, and you're working to restore flexibility. In these first critical days, heat makes things worse.
Stretching the injured muscle aggressively or trying to "work through" the tightness tears healing fibers. The muscle needs protection right now, not stress. Gentle range of motion comes later, once the acute inflammation has settled. Forcing movement too early extends your recovery timeline by weeks.
How Alcohol and Medications Affect Calf Healing
Alcohol and anti-inflammatory medications beyond what your doctor recommends can interfere with the body's natural healing response. Inflammation serves a purpose in the early stages.
It brings healing cells to the injury site and begins the repair process. Completely suppressing inflammation can delay healing, even though controlling excessive inflammation helps. The balance matters.
Protect Fragile Muscle Fibers First
Massage, even gentle massage, can disrupt fragile healing tissue in the first few days. Deep tissue work or aggressive stretching can cause additional tearing. Wait until the acute phase passes and you have professional guidance before introducing manual therapy.
The First Week Protocol
After the initial 48 to 72 hours, gentle movement becomes important. This doesn't mean returning to training. It means carefully introducing a range of motion exercises that prevent stiffness without stressing healing tissue.
Ankle pumps (slowly flexing your foot up and down), gentle calf stretches held for short durations without pain, and light walking if tolerable all help maintain mobility without causing setbacks.
Using Pain as a Guide in Calf Recovery
Pain guides your progression. If a movement creates sharp pain or causes symptoms to flare up significantly 24 to 36 hours later, you've pushed too far. Back off and give the tissue more time. If a movement feels mildly uncomfortable but doesn't spike your pain, it's probably appropriate. You're looking for the edge of your current capacity, not trying to expand it aggressively yet.
The Challenge of Ambiguous Calf Recovery Advice
Many people struggle with this phase because the guidance feels vague. "Gentle movement" and "don't push too hard" leave too much room for interpretation. How do you know if you're doing enough to prevent stiffness but not so much that you're delaying healing? The gap between generic advice and specific, progressive programming is where people either recover smoothly or get stuck in cycles of improvement and setback.
The Pitfalls of Trial-and-Error Recovery
Traditional recovery methods rely on you figuring out this balance through trial and error. You're given general principles but no clear roadmap for what exercises to do, in what order, with what intensity, or on which days. This guesswork approach works for some people, but it fails for many others who either do too little and develop chronic stiffness or do too much and re-injure themselves.
Pliability: Structured, Phase-Specific Calf Rehab
Solutions like Pliability provide structured progression through guided video routines tailored to each phase of calf strain recovery. Instead of guessing whether a movement is appropriate, you follow expert-designed protocols that match your current healing stage.
The programming adapts as you progress, introducing new exercises and increased intensity only when your tissue is ready to handle it. You're not navigating recovery alone with generic advice. You're following a clear path built on movement science and clinical experience.
Related Reading
- Do Muscle Tears Heal On Their Own
- Forearm Strain
- How Can Strengthening Muscles Prevent Injury
- Quad Strain Recovery Time
- Urgent Care For Pulled Muscle
- How To Prevent Hamstring Injuries
- How Long Does a Sprained Knee Take to Heal
- How Does Stretching Prevent Injury
- How Long Should Swelling Last After an Injury
- How To Strengthen Shins For Running
- Athletic Injury Recovery
How to Heal a Calf Strain Faster and Prevent Re-Injury
Once the acute inflammation settles, your focus shifts from protection to progressive rebuilding. The muscle needs controlled stress to regain strength, but the line between helpful loading and harmful overload requires precision that most people don't have. This phase determines whether you return stronger or develop chronic weakness that invites re-injury.
Immediate Injury Response (The First 48 Hours)
The P.O.L.I.C.E. principle (Protection, Optimal Loading, Ice, Compression, and Elevation) replaces the outdated R.I.C.E. approach because complete rest creates its own problems.
Protection means stopping activities that cause pain and using crutches or a brace if walking hurts. You're preventing the tear from worsening while maintaining minimal, controlled movement that doesn't stress damaged fibers.
Optimal Loading: Moving Without Harming a Calf Strain
Optimal Loading introduces a crucial distinction. Some movement helps align new muscle fibers and prevents disorganized scar tissue from forming. Total immobilization leads to stiffness, muscle atrophy, and weaker tissue that tears more easily when you eventually return to activity. The challenge is identifying which movements help versus which ones extend the damage.
Applying Ice, Compression, and Elevation Correctly
Ice application follows a specific timing. Apply a cold pack wrapped in a thin towel for 15 to 20 minutes, with at least an hour between applications, during the first 48 to 72 hours. The cold reduces pain and limits swelling without suppressing the inflammatory response entirely.
Compression with an elastic bandage helps control fluid accumulation, but if you feel numbness or increased pain, you've wrapped it too tightly. Elevation above heart level uses gravity to drain excess fluid away from the injury site, reducing pressure that creates pain.
Transitioning to Active Recovery
After 48 to 72 hours, gentle range-of-motion exercises become essential. Ankle pumps involve slowly pointing your toes away from your body, then pulling them back toward you within a pain-free range. Perform two sets of 15 repetitions several times daily. These simple movements circulate blood and maintain mobility without aggressively loading the damaged muscle fibers.
Using Ankle Circles to Restore Mobility
Ankle circles, rotating your foot slowly clockwise and counterclockwise, restore joint movement that stiffens quickly after injury. These initial movements should be non-weight-bearing and strictly limited by pain. If discomfort increases during the exercise or spikes significantly 24 hours later, you're pushing too hard. Back off and give the tissue more time.
The Challenge of Subjective “Gentle” Movement
Many people struggle here because pain tolerance varies, and "gentle" means different things to different people. One person's careful movement is another person's aggressive loading. Without objective feedback or expert guidance, you're relying on subjective interpretation, which often leads to either excessive caution that prolongs recovery or premature intensity that causes setbacks.
Recognizing When to Seek Professional Help
Most Grade 1 strains respond well to self-care, but certain signs indicate more severe damage that may require medical evaluation. An audible pop or snapping sensation at the moment of injury suggests significant tearing or complete rupture. Immediate, severe pain that makes weight-bearing impossible requires professional assessment, not home management.
According to the Cleveland Clinic, which employs over 65,000 healthcare professionals, a visible deformity where the muscle bunches abnormally indicates a Grade 3 tear that may require surgical repair. Persistent pain at rest or during the night, especially after the first 48 hours, signals complications beyond typical strain recovery.
The Challenge of Subjective “Gentle” Movement
Excessive swelling that doesn't improve with elevation and ice, or bruising that spreads rapidly down the leg toward the ankle, can indicate more extensive tissue damage than initially apparent.
If symptoms worsen rather than gradually improve during the first week, a professional evaluation can determine whether you're dealing with a simple strain or a more complex injury that requires different treatment.
Safe Return to Activity and Long-Term Prevention
Returning to full activity requires objective criteria, not just feeling better. You need a complete, pain-free range of motion in the injured calf compared to the uninjured side. Strength must be equal between both legs, as tested through functional movements such as single-leg calf raises.
If you can't perform 15 controlled repetitions on the injured leg when you can easily do 20 on the uninjured leg, you're not ready for high-impact activities.
Eccentric Exercises for Calf Strength
Eccentric exercise builds resilient muscle tissue by strengthening the muscle's ability to contract while lengthening. Eccentric heel drops involve raising up on both feet, then slowly lowering the injured heel over five to six seconds. This controlled lengthening under load prepares the muscle for the demands of running, jumping, and sudden direction changes that initially caused the injury.
Targeting Gastrocnemius and Soleus
Both straight-knee and bent-knee calf raises ensure complete recovery. Straight-knee raises target the gastrocnemius, the larger superficial muscle. Bent-knee raises emphasize the soleus, the deeper muscle that handles different loading patterns. Neglecting either creates an imbalance in strength that leaves you vulnerable to reinjury when you return to sport.
Preventing Re-Injury After a Calf Strain
Proper warm-up routines before training sessions increase tissue temperature and improve elasticity, making muscles more resistant to tearing. Appropriate footwear provides cushioning and support that reduces impact forces traveling through the calf during ground contact.
These preventive measures matter more after you've already experienced one strain because the scar tissue that forms during healing creates a slightly weaker area prone to re-injury if you don't address underlying risk factors.
When Can I Start Calf Strain Rehabilitation Exercises?
Immediately. Active range-of-motion exercises within pain-free ranges actually promote healing and prevent excessive myofascial tightness. Motion is lotion. The phrase sounds simplistic, but the principle reflects how movement circulates synovial fluid, delivers nutrients to healing tissue, and prevents adhesions that limit flexibility.
Begin with ankle pumps and ankle circles within pain-free ranges. Never push through pain with these movements. The goal is maintaining mobility, not aggressively expanding it. Two sets of 15 repetitions, multiple times per day, keep the joint moving without stressing healing muscle fibers.
Progress Isn’t Always Linear
As swelling, pain, and tightness decrease over the following days and weeks, you slowly progress the intensity and difficulty of rehabilitation exercises. This progression isn't linear. Good days and bad days persist throughout recovery.
Some mornings you'll wake up feeling significantly better, only to experience increased discomfort after a normal day of walking. This variability is normal and doesn't indicate re-injury unless pain spikes dramatically or new symptoms appear.
1. Seated Calf Stretch
This classic stretch targets all calf muscles with minimal equipment. Sit with both legs stretched straight in front of you. Bend the unaffected leg to get the foot flat on the floor for stability. Hold both ends of a towel or a solid strap, hook it around the forefoot, and pull your foot backward until you feel a gentle stretch in the calf.
Hold for 15 to 30 seconds, relax, and return to the starting position. Repeat two to three times. Alternatively, hold for one to two seconds before reversing to the starting position, repeating 10 to 15 times for two sets. The longer hold emphasizes sustained lengthening, while the shorter repetitions focus on active movement through range.
2. Lunging Calf Stretch
This movement uses body weight to stretch your calf muscles more aggressively than the seated version. Stand at arm's length from a wall with feet shoulder-width apart. Lean against the wall with your palms, then take a long step backward with the affected leg, just far enough to keep your foot flat on the floor.
Lunge forward on your front knee until you feel a strong stretch in the affected calf area. Hold for 15 to 30 seconds and repeat two to three times. Alternatively, hold the stretch for one to two seconds and repeat 10 to 15 times. This variation allows you to adjust intensity by changing how far back you step and how deeply you lunge forward.
3. Heel Raises
Heel raises build strength and size in your calf muscles through progressive loading. Stand tall behind a chair, feet shoulder-width apart, holding the chair for support. Lift your heels straight up, keeping your forefoot firmly on the ground. Lower the heels back down with control.
Repeat 10 to 15 times for your first set. Aim for three to four sets. Once you're proficient, eliminate the chair to increase balance demands and force your calf muscles to work. This progression matters because balance challenges activate stabilizing muscles that protect against future injury.
4. Step Heel Raises
Step raises increase difficulty by allowing your calves to operate at a more lengthened position than basic heel raises. Stand on the edge of a step board on your forefoot with feet shoulder-width apart. Lower your heels straight down below the edge of the board. Raise your heels straight up to full range, then reverse to the starting position.
Repeat 10 to 15 times, rest for 30 seconds to one minute, and aim for three to four sets. Once proficient, hold a dumbbell in each hand or bend the unaffected leg to increase the load on the affected side. This variation prepares the muscle for explosive movements by strengthening it through a greater range of motion than flat-ground raises provide.
5. Seated Heel Raises
This exercise focuses on the soleus muscle by performing calf raises with bent knees. Bent knees slacken the gastrocnemius, limiting its involvement and placing more demands on the soleus underneath. Sit in a chair with your feet flat on the floor, hip-width apart. Raise your heels, shifting your leg weight onto the forefoot. Lower your heels with control to the starting position.
Aim for 10 to 15 repetitions across three to four sets. Upgrade using cuff weights on both ankles or rest a dumbbell on each thigh. The soleus handles different loading patterns than the gastrocnemius, particularly during sustained standing and slower movements. Strengthening it separately can lead to an imbalanced recovery, leaving one muscle strong while the other remains weak.
6. Rotated Heel Raises
These variations concentrate the load on the inner and outer parts of the gastrocnemius muscles. External rotation heel raises focus the load on your inner gastrocnemius. Stand tall with feet slightly inside shoulder-width, rotate your feet outward at about 45 degrees, then raise your heels to full range. Hold the top position for one to two seconds and reverse to the starting position. Aim for three to four sets of 10 to 15 repetitions.
Internal rotation heel raises emphasize your outer gastrocnemius. Stand tall with feet shoulder-width apart, rotate your feet and legs inward, then raise your heels to the top position. Reverse to the starting position and aim for three to four sets of 10 to 14 repetitions. These variations can be upgraded by holding a dumbbell in each hand or attaching cuff weights to your ankles.
Activities to Avoid
Aggressive massage aggravates the injured muscle and delays natural healing. The tissue needs time to knit back together without external disruption. Heat therapy should not be used until after the acute inflammatory stage passes, typically one to two weeks post-injury. Heat causes vasodilation of capillaries in the injured area, leading to increased swelling and pain.
Why Pushing Too Early Worsens Strains
Participation in high-stress or high-impact activities during early recovery is self-limiting. Your body will tell you through pain that these movements aren't appropriate yet.
The challenge is that some people push through moderate discomfort, thinking they're toughing it out, when they're actually extending the tear and converting a Grade 1 strain into a Grade 2 injury that requires weeks of additional recovery.
Why Generic Advice Often Falls Short
Traditional recovery approaches provide general guidelines but leave you guessing about daily decisions.
- How much pain is acceptable during an exercise?
- When do you progress from bodyweight to weighted movements?
- Which exercises should you do on which days?
The gap between knowing general principles and executing specific, progressive programming is where recoveries either succeed smoothly or stall in frustrating cycles of improvement and setback.
Recover Faster From a Calf Strain With Guided Mobility
Healing tissue is one thing. Restoring full movement capacity without guessing your way through is another. You need a system that matches your current capacity, progresses you safely, and addresses the specific restrictions that put you at risk for re-injury in the first place.
Most people follow generic stretching advice and hope it's enough. They're told to "work on flexibility" and "strengthen the calf," but what does that actually mean on Tuesday morning when you're not sure if yesterday's session was too much or too little? The familiar approach relies on interpretation, and interpretation creates gaps where recoveries either stall or setbacks happen.
Pliability: Guided Calf Recovery From Start to Finish
Pliability offers guided mobility routines specifically designed for calf and lower leg recovery. The programming walks you through exercises that match your healing phase, from early range-of-motion work when the tissue is still fragile to loaded strength movements when you're ready to return to sport.
You're not guessing whether a stretch is appropriate or a calf raise is premature. You're following expert-designed progressions that adapt as your tissue rebuilds capacity.
Body Scanning to Detect Hidden Restrictions
The app includes body scanning that identifies movement restrictions you might not notice on your own. Tightness in your ankle, limited dorsiflexion, compensatory patterns in your hip, these restrictions don't just slow recovery.
They create the conditions for re-injury because your body finds ways to move that protect the weak area while overloading something else. Scanning reveals what needs attention before it becomes your next problem.
Targeted Calf Routines for Efficient Recovery
Calf-focused routines reduce stiffness while improving blood flow to healing tissue. The movements are specific, not generic. You're not doing random stretches hoping they help.
You're targeting the gastrocnemius, soleus, and surrounding fascia with exercises sequenced to restore function without pushing into ranges that stress vulnerable fibers. Each session takes 15 to 25 minutes, which matters when you're balancing recovery with work, training, and life.
Recover Fully, Not Just Pain-Free
The difference between recovery and recovery well comes down to whether you address the root cause or just treat the symptoms. Pain subsides, but if you haven't restored the full range of motion, rebuilt strength through the entire muscle length, and corrected movement patterns that contributed to the strain, you're returning to activity with the same vulnerabilities that injured you initially.
Pliability helps you rebuild completely, not just feel better temporarily. If a calf strain is keeping you out of training, don't rely on guesswork. Try Pliability free for 7 days and start moving better, safely, and confidently.
Related Reading
- How To Prevent Stress Fractures From Running
- How To Fix Lower Back Pain From Running
- Care And Prevention Of Athletic Injuries
- Knee Injury Prevention Exercises
- Compression Therapy For Athletes
- Soccer Injury Prevention Exercises
- Best Foam Roller For Runners
- Ankle Injury Prevention Exercises
.jpg)


