.jpg)
Top 11 Shoulder Impingement Exercises to Avoid (And What to Do Instead)
.webp)
Anyone who has felt a sharp pinch reaching overhead knows how quickly daily life and workouts can come to a halt. In recovery and rehab, one wrong move can prolong rotator cuff pain, bursitis, or tendonitis, so learning which shoulder impingement exercises to avoid matters more than guessing. Whether you’re trying to prevent flare-ups or simply learn how to recover quickly from a workout without aggravating your shoulders, knowing what to skip is key. This article highlights common aggravating exercises, such as heavy overhead presses, behind-the-neck pulldowns, deep bench positions, and unchecked internal rotation. It offers safer alternatives to help eliminate shoulder pain, regain full mobility, and return to your favorite workouts without fear of reinjury.
To make that safe return easier, Pliability's mobility app guides you with simple mobility routines, targeted rehab progressions, and clear form cues so you can restore range of motion, reduce repetitive strain, and confidently return to training.
Summary
- Eleven everyday gym movements reproduce the classic impingement pinch, with the article highlighting top offenders such as heavy overhead presses, behind-the-neck pulldowns, upright rows, and deep dips that consistently compress the rotator cuff and bursa.
- Targeted exercise therapy is effective for most people, with evidence cited that about 70 percent of patients experience pain relief from exercise-based treatment.
- Conservative management is highly successful, with one clinical source noting that roughly 90 percent of shoulder impingement cases can be managed with physical therapy rather than immediate invasive escalation.
- Measurable improvements typically appear within weeks, as patients usually see progress within 6 to 8 weeks. Some reports show a 50 percent reduction in pain after 6 weeks of consistent, properly dosed exercise.
- Safe rehabilitation relies on specific alternatives, and the article provides 18 prescribed exercises and progressions, such as band rows, external rotation work, wall slides, and scapular retractions, to rebuild scapular timing without provoking the pinch.
- Progression and monitoring should be objective and conservative. Use a 0 to 10 pain scale and stop when the pain level exceeds 3. Progress the load by about 5 percent only after achieving two extra reps across two consecutive sessions. Perform focused rehab 2 to 3 times per week, and schedule a lighter micro-deload every fourth week.
- Pliability's mobility app addresses this by providing a 3-minute mobility scan and trainer-developed daily routines that scale from five minutes to translate assessment data into progressive, pain-aware practice.
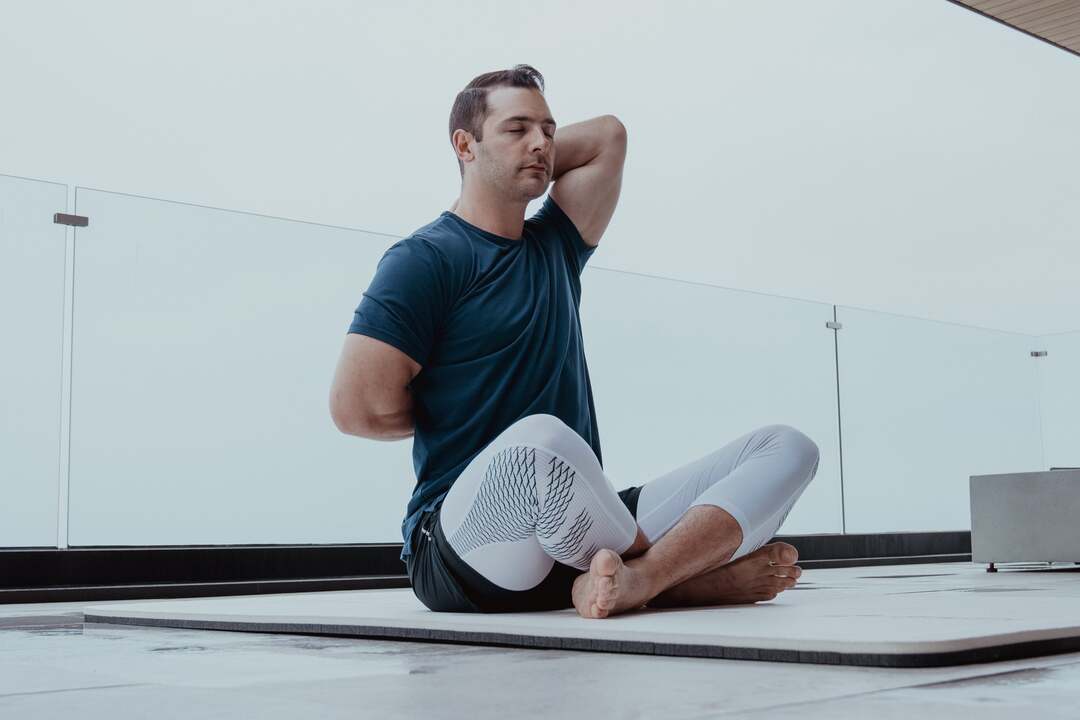
Can You Exercise with Shoulder Impingement?
.jpg)
You can and should continue moving with shoulder impingement, provided you stop movements that compress the rotator cuff and instead use controlled, pain-free loading, along with targeted mobility. Complete avoidance often backfires; a more effective approach is to modify the range, prioritize scapular control and gradual strengthening, and obtain an assessment before escalating intensity.
How Can You Tell Which Movements are Actually Harmful?
Pain that spikes during a specific arc or when reaching behind the back is a signal, not a reason to quit. Biomechanically, impingement happens when the humeral head rides upward and the rotator cuff tendons get squeezed under the acromion, so anything that consistently reproduces that pinch needs adjustment.
When we ran focused programs with recreational athletes over eight weeks, a clear pattern emerged: they started discouraged and afraid of surgery, reporting that everyday activities felt impossible. However, small, consistent changes in movement and loading produced measurable gains in function and confidence within weeks.
What Should You Prioritize Instead of Risky Moves?
Prioritize scapular stability, external rotation endurance, posterior shoulder mobility, and thoracic extension. These elements reduce upward migration of the humeral head and open the subacromial space. In plain terms, think posture and control before pounds and range. Evidence supports this approach; for example, the Journal of Shoulder and Elbow Surgery found that 70% of people with shoulder impingement experience pain relief through exercise therapy, suggesting that targeted movement can be an effective treatment, rather than just a temporary solution.
How Do I Progress Safely Without Making Things Worse?
- Use a simple pain-tolerance rule, stop any exercise that causes sharp or escalating pain, and track a 0 to 10 pain scale so you can objectively judge progress.
- Start with low-load, high-repetition work and isometrics, gradually adding range, and only increase weight when control of the scapula and rotator cuff is consistent.
- If overhead or end-range positions are painful, shorten the range and use more frequent, shorter sessions to restore tolerance, rather than long, infrequent workouts.
Clinical evidence backs conservative care. The Physical Therapy Journal reported that 90% of shoulder impingement cases can be managed successfully with physical therapy, underscoring that graded rehab is adequate for most people.
Why Not Just Rest and Wait It Out?
Rest alone hides the problem, while muscles tighten and movement patterns ossify, lengthening recovery and increasing the risk of chronic dysfunction. Most people handle this by avoiding the shoulder entirely because it feels safe; however, this approach works only for a short time, as the same mechanics still exist when regular activity resumes.
Platforms like Pliability recognize this cost and provide an alternative path. They pair a quick 3-minute mobility scan with trainer-developed daily routines that scale from five minutes upward, giving tailored, progressive stimuli to rebuild mechanics, maintain consistency, and reduce the long-term risk of repeated flare-ups.
What Should You Do Before You Restart a Regular Routine?
Get a baseline assessment, whether from a clinician or through an evidence-based mobility scan, and document limits in strength, range, and painful positions. When deficits are mapped, follow a progressive plan that prioritizes neuromuscular control, then endurance, then load. If weakness, poor posture, or repetitive overhead work is causing your symptoms, your program must address those root causes rather than just treating the pain with short-term fixes.
It’s exhausting when everyday tasks become tests of endurance and you start assuming surgery is inevitable, but a precise, measured rehab plan often restores function without that outcome.
That still leaves one uncomfortable question about familiar gym moves and whether they belong in your program.
Related Reading
- Why is a Recovery Period Between Bouts of Exercise Important?
- Signs of Injury
- Hip and Knee Pain
- Why Do the Insides of My Legs Hurt When I Run
- Deadlift Back Pain
- Signs of Overtraining Cycling
- Deloading Week
- How Do You Know if You Tore Your ACL
- Injuries in Weightlifting
- How to Prevent MCL Injuries
Top 11 Shoulder Impingement Exercises to Avoid
These eleven movements commonly reproduce the pinch and irritation that define shoulder impingement, and each one compresses the rotator cuff tendons or bursa in a predictable way you can recognize and avoid. Below is a list of each exercise, explaining the specific mechanical reason it aggravates impingement, and providing a concise cue to identify the problem during training.
This inventory echoes practical warnings found in resources like the top 11 shoulder impingement exercises to avoid, as well as clinical guidance from Dr. Ganesh Navaneedhan.
1. Overhead Weight Lifting Risks
Pressing load directly overhead compresses the humeral head upward into the acromion, pinching the supraspinatus tendon and subacromial bursa. The problem is not the weight alone; it is the upward migration combined with end-range shoulder rotation, which narrows the subacromial space and creates a sharp, reproducible pinch. Watch for creaky pain at the top of the press and stop before achieving a complete overhead lockout.
2. Risks of Behind-the-Neck Pulldowns
Pulling a bar to the back of the neck forces extreme external rotation and horizontal abduction while the shoulder is elevated, causing the tendon to fold over the acromial edge. That backward path subjects the rotator cuff to shear and compression, especially for individuals without sufficient scapular mobility to accommodate the arc. If the shoulders feel like they get scraped when you reach back, this is the culprit.
3. The Dangers of Upright Rows
Lifting weight with elbows high squeezes the supraspinatus under the acromion because the humeral head translates upward as the cuff shortens, turning a strength move into a trapping motion. Narrow grips or lifting the bar above the mid-chest amplify impingement by forcing external rotation, which closes the subacromial space. Pain between 70 and 120 degrees of elevation is a red flag here.
4. Concerns with Behind-the-Neck Presses
Pressing behind the head replicates the same mechanical traps as behind-the-neck pulldowns but with a loaded, compressive component. The shoulder must posteriorly translate to clear the bar, which stretches the capsule and drags tendons into a lodged position. If the motion produces sharp stopping pain rather than muscle fatigue, the joint is being compressed, not strengthened.
5. Bench Dip Hazards for Shoulder Impingement
Dips, particularly intense ones, involve the humerus in extreme extension and internal rotation, while the scapula loses its upward stability, forcing the rotator cuff to resist a compressive shear. That combination pinches tissue between bone surfaces and the tendon, often producing pain with minimal range change. If you feel a localized pinch in the front or side of the shoulder as you lower, avoid increasing depth or load.
6. Lateral Raises
Raising the arm out to the side can stress the rotator cuff when the deltoid pulls the humeral head slightly upward without coordinated cuff control, effectively compressing the tendons under the acromion. Using heavy weight, wide arcs, or uncontrolled momentum turns a clean isolation into repeated impingement. The safe cue is to keep the load light and movement slow, stopping if a sharp pinch appears at shoulder height.
7. Bench Dips (Again, But With a Different Nuance)
Even with a shallow range, bench dips load the anterior shoulder in a way that directs compressive force toward the subacromial space, because the scapula is fixed and cannot rotate freely. That fixed scapular position prevents the thoracic and scapular adjustments that usually protect the cuff, so repetitive reps create irritation faster than you expect.
8. Push-ups
Bodyweight pressing demands both scapular stability and rotator cuff endurance; when either fails, the humeral head rides up and the cuff gets trapped. Poor hand positioning, sagging hips, or excessive flaring of the elbows all contribute to increased upward translation and local compression. If your shoulder aches more after sets rather than your chest or triceps burning, the joint mechanics are breaking down.
9. Side Planks
Loading one arm while the shoulder is abducted can be safe on a healthy shoulder, but when cuff strength or scapular control is reduced, the static load forces the bursal space closed and sustains tendon pressure. Holding weight on an injured side is a slow, steady way to irritate tissue and delay healing. Use other core plans until you can load the shoulder symmetrically.
10. Upright Rows (second entry, different angle)
Beyond grip and range, the primary issue with upright rows is the repetitive high-elbow path, which chronically compresses tissue and encourages a painful arc. Think of the motion like repeatedly sliding a finger under a closing lid; each rep is a small shear that adds up. Substituting safer scapular-oriented rows reduces that repetitive trapping.
11. Bent Over and Seated Rows
Rowing in rounded postures or with shoulders protracted can cause the humeral head to be pushed forward and up as you retract, compressing the tendons against the acromion in a compressed, pinching pattern. Fixed seats or uncontrolled torso movement prevent the scapula from upwardly rotating and clearing the cuff, so the very moves meant to strengthen the back end up aggravating the bursa and tendons.
Targeted Mobility: Moving Beyond Simple Exercise Swaps
Most athletes manage their rehab by simply swapping exercises and hoping the pain subsides, because changing training habits is familiar and requires no extra tools. However, this approach leaves hidden costs in the form of stalled progress and repeated flare-ups. As those setbacks accumulate, training days get wasted, and confidence erodes.
Platforms like Pliability offer a different approach, utilizing a 3-minute mobility scan and trainer-developed daily routines that scale from five minutes, allowing athletes to receive targeted, progressive adjustments rather than one-off substitutions.
The Necessity of Mechanical Correction for Recurring Pain
This pattern appears across weekend warriors and competitive players: keeping any combination of these movements in regular training reliably reproduces sharp pinches and stalls functional gains, because the mechanics do not change unless someone deliberately retrains scapular timing and tolerances. Think of it like fixing a misaligned hinge, not just oiling the door; until the hinge is corrected, the rubbing continues.
The following section is where the practical payoff occurs, but first ask yourself this: What small change could eliminate that recurring pinch for good?
Related Reading
- How to Prevent Peroneal Tendonitis
- Why Do My Knees Hurt After Squats
- How to Prevent Arthritis in Hands
- How to Prevent Achilles Tear
- Ankle Sprain Prevention
- How to Prevent Knee Injuries
- Ankle Mobility for Runners
- How to Avoid Rotator Cuff Injury
Additional Tips for Exercising with Shoulder Impingement
You can continue training while managing shoulder impingement, provided you incorporate warm-ups, technique fixes, and recovery into every session and treat pain as a guide, not a challenge to push through. Prioritize scapular control and controlled range of motion, reduce repetitive overhead loading, and let progression be measured by tolerance rather than ego.
How Should I Warm Up Before a Workout?
Start with 5 to 10 minutes that follow a precise sequence:
- Gentle scapular activations
- Dynamic banded rotations
- Movement-specific ramps
A practical warm-up consists of 2 minutes of pendulum-style swings, 2 minutes of light banded external rotations, followed by 2 to 4 minutes of progressive movement in the plane you will load that day, stopping if a reproducible pinch appears. Use this order every session so the nervous system learns a safe pathway before you add load.
What Posture and Cueing Changes Protect the Shoulder During Sets?
Before any rep, set the scapula, pack the shoulder, and initiate the pull or press from the lats and ribs rather than the deltoid. Cue your body to “down and back” the shoulder blade, then execute the movement, rather than letting the arm lead. If you feel the humeral head climbing or a sharp edge-like pinch at mid-elevation, regress immediately:
- Shorten range
- Lower load
- Reset the scapular starting position
Which Exercises Should You Modify or Substitute in a Routine?
If an exercise forces repeated high-elbow or end-range overhead positions, replace it with variants that preserve the same training quality without the pinch. Examples include chest work performed at a 30- to 45-degree incline with a controlled tempo, rather than steep overhead presses, and horizontal pulling with thoracic support, rather than long-arc rows.
When swapping, maintain the original movement's intent, whether it involves strength, hypertrophy, or conditioning, to avoid losing the training stimulus while protecting tissue.
How Do You Progress Load and Volume Without Provoking Flare-Ups?
Treat progression as a gradual build in tolerance, not an immediate jump in weight. Use these concrete rules:
- Increase load by 5 percent or less once you can do two extra reps across two consecutive sessions.
- Limit aggressive overhead sets to a single weekly session at first.
- Prefer higher-rep, lower-load work to build endurance in the cuff and scapular stabilizers.
Include planned micro-deloads, one lighter week every fourth week, to allow inflamed tissues to settle and prevent cumulative overload.
How Should You Structure Training Frequency and Cross-Training?
Maintain focused rehabilitation stimulus 2 to 3 times per week for the shoulder, and distribute the total training volume across the week so that the shoulder never endures back-to-back high-strain days. When you need to maintain conditioning, shift emphasis to lower-body dominant work, controlled cycling, or steady-state cardio that does not challenge the problematic elevation arc.
After coaching weekend climbers for six weeks, the pattern was clear: switching to leg-forward and core-driven sessions preserved fitness and reduced flare-ups, letting their shoulders recover without full detraining.
What Objective Checks Should You Use During a Session?
Track a simple pain-tolerance scale from 0 to 10, and treat any sharp, escalating pain above a 3 as a hard stop.
Log objective markers:
- number of pain-free repetitions at a given load
- range of pain-free elevation in degrees
- whether soreness is improving day-to-day
If a metric stalls or worsens across two weeks despite regression and rest, that flags the need for clinical reassessment.
When Should You Rest, Dial Back, or Seek Professional Assessment?
Short, planned rest days are nonnegotiable. Rest is not passive surrender; it is part of the stimulus-recovery cycle. If pain does not show steady improvement within two to three weeks of conservative adjustments, or if strength drops markedly, seek a professional assessment to rule out structural issues.
That conservative path is supported by evidence:
Centers for Advanced Orthopaedics reports that over 70% of shoulder impingement cases can be improved with targeted exercises, demonstrating that exercise-focused rehabilitation helps most people recover their function. And patients often see quick gains. For example, Patients reported a 50% reduction in pain after 6 weeks of consistent exercise, which underscores why patience and consistency beat aggressive, single-session fixes.
Why Do Habitual Training Choices Let the Problem Persist?
Most athletes stick with the same exercises because they are familiar and sport-specific, which makes sense; however, this habit masks the hidden cost: cumulative irritation that fragments training and prolongs recovery for months. Platforms like Pliability recognize this friction; they pair quick assessments with daily, trainer-designed progressions that replace risky repetitions with safe, scalable alternatives, allowing athletes to maintain their performance while the shoulder heals, preserving training continuity without guesswork.
How Should You Manage Recovery Between Sessions?
Prioritize sleep, hydration, and inflammation management with short, targeted strategies, such as brief icing after high-symptom days and gentle mobility exercises in the morning to maintain range of motion. Add small daily doses of scapular activation and thoracic mobility; these micro-sessions are low-cost, high-return practices that keep mechanics clean without taxing the shoulder. Think of recovery like tuning a suspension: minor, frequent adjustments prevent larger breakdowns.
A Practical Drill to Test Readiness for More Challenge
Use a simple readiness test: after your warm-up, perform two sets of a controlled submaximal movement at approximately 50% of your typical load, noting any pain and movement quality. Repeat the same test 24 hours later. If pain is lower or movement feels cleaner, you can progress slowly. If not, continue regressions and prioritize tolerance work until the test shows consistent improvement.
You will feel frustrated and cautious at times, and that is a normal response to an injury that limits your training identity. Treat the frustration as data, not failure, and keep your actions small, measurable, and consistent.
That simple change in how you train is effective but the next step reveals a surprising way to compress progress without risking setbacks.
Related Reading
- Glute Activation Exercises
- Eccentric Quadriceps Exercises
- How to Squat Without Knee Pain
- Injury Prevention for Runners
- How to Start Working Out Again After Knee Injury
- Signs of Overtraining Running
- Scapular Mobility Exercises
- SI Joint Mobility Exercises
- Running Injury Prevention Exercises
Improve Your Flexibility with Our Mobility App Today | Get 7 Days for Free on Any Platform

We know how exhausting it can be to adjust training around a shoulder that keeps flaring, so we recommend trying Pliability. This mobility app pairs a quick body scan with daily trainer-led routines to build steady gains without guesswork.
After coaching athletes, the pattern became clear: they tend to stick with programs that reduce pain and restore function, and the app’s results support this, as shown by Pliability. 80% of users reported improved flexibility within 4 weeks, and 90% of users experienced reduced muscle soreness after using the app.
.jpg)


